| |
|
click for a larger image |
When my dad drove my car, the first thing he said was,
"Are your headlights broken?" They weren't, but the stock
headlights are a bit dim and yellow so I decided to upgrade my lights.
Standard headlights are usually halogen bulbs, but some cars now have
High Intensity Discharge (HID) lights which are more expensive but
provide much brighter, whiter light.
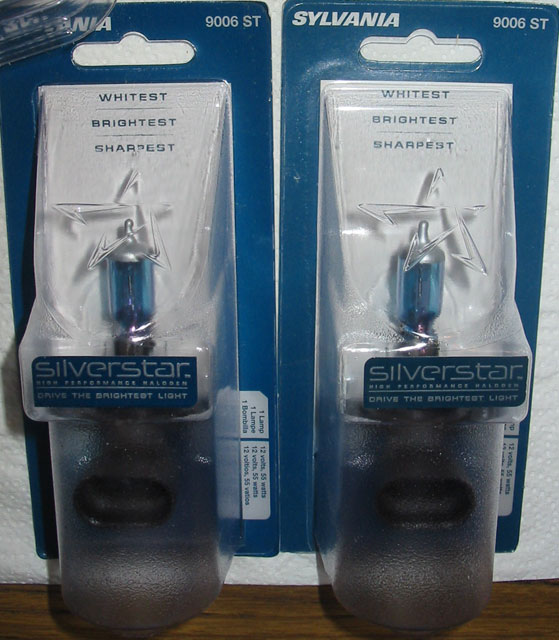
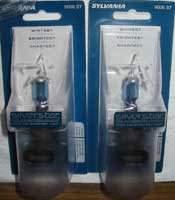
I didn't want to spend the money for HID, so I these Sylvania SilverStar
halogens which have a whiter color (a higher color temperature) as
well as about 20% higher luminence (brightness) as stock. |
|
 |
|
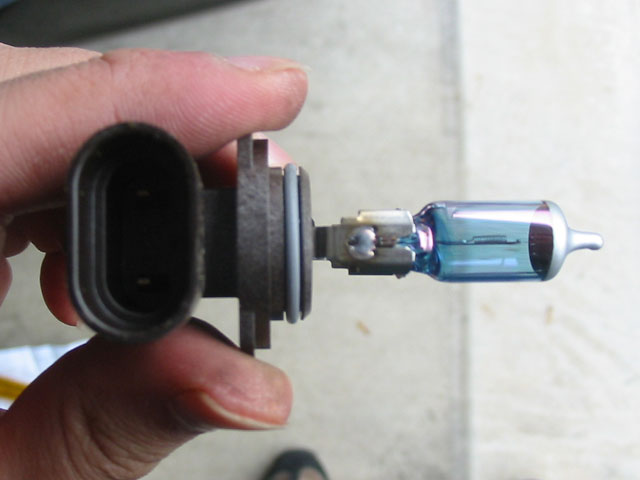
| Here's a picture of a SilverStar out of the box. Since
these are halogens, you should not touch the bulb directly with your
fingers as the dirt and/or oil may cause the bulb to break. You can
hold the bulb housing. |
|
 |
|
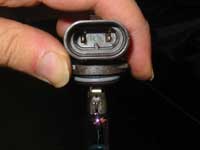
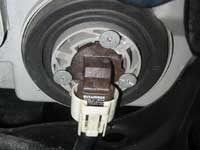
| Here's a better picture of the socket/housing for the
lightbulb. This bulb is part #9006, which is the low beam for Hondas.
9005 is for high beam and has the same socket/housing except for a
different shaped plastic peg so you can't mix the two. You can, however,
shave off the peg to interchange them. This is another way to improve
the brightness of your low beams... simply place a higher wattage
high beam bulb in it! |
|
 |
|
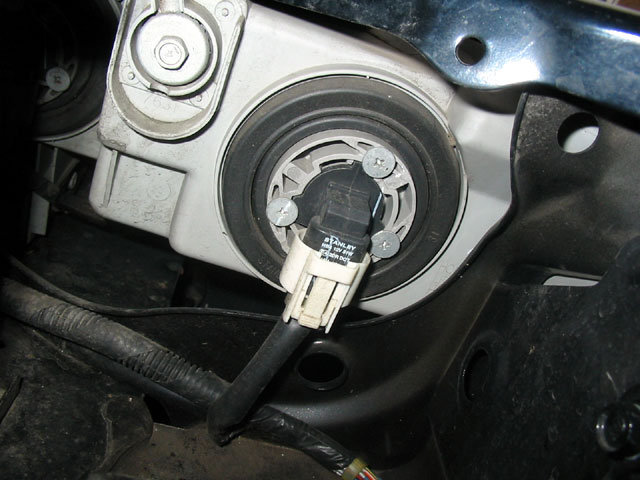
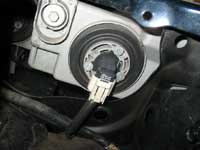
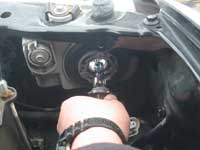
| Pop your hood and right behind your headlights you
should see where the wire harness/plug connects to the socket/housing.. |
|
 |
|
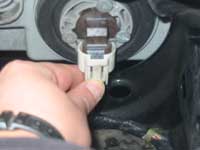
| On the white plug you should see a tab that secures
the harness to the socket. Simply press on the tab and remove the
plug from the housing. |
|
 |
|
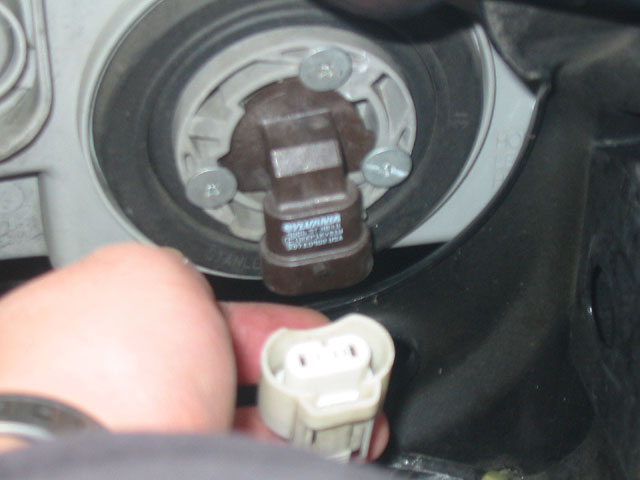
| It may be a little tough getting it unplugged but a
little wiggling should do the trick. Just make sure you've got the
tab pushed down all the way so you don't damage the plug. |
|
 |
|
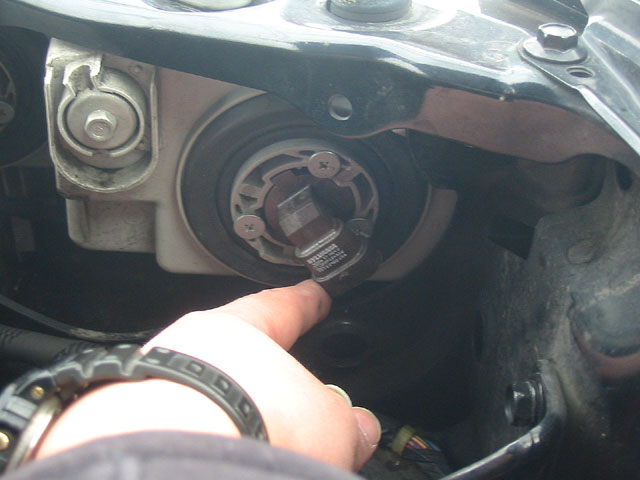
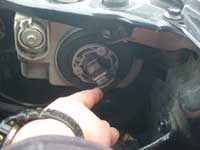
| Now, simply grab the bulb housing and rotate it (counter-clockwise
in this case). It should pop out of place and turn about 30 degrees.
If you cannot rotate it, you can loosen the three screws that hold
the housing. This should free it up a little, although I did not need
to do this. |
|
 |
|
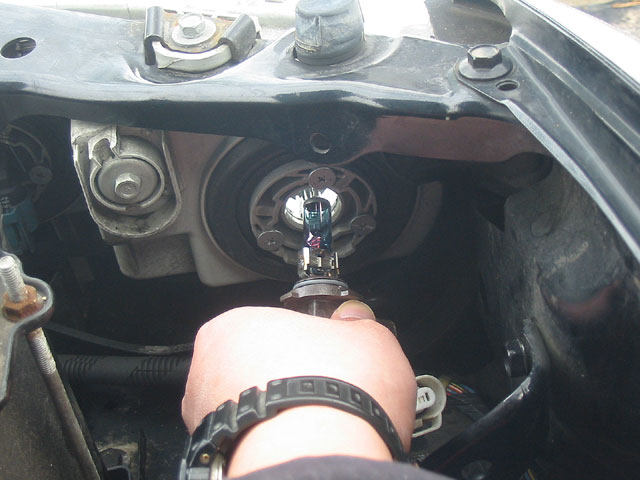
Now, the bulb is rather loose so you can simply pull
it out.
Take the new bulb and put it back in at the same angle, then rotate
the opposite direction (clockwise) until it snaps back into place..
If you loosened the screws, tighten them up again. |
|
 |
|
| Plug the harness back into the housing and turn on
your headlights to see if they work. If so, you're done! |
|
 |
|
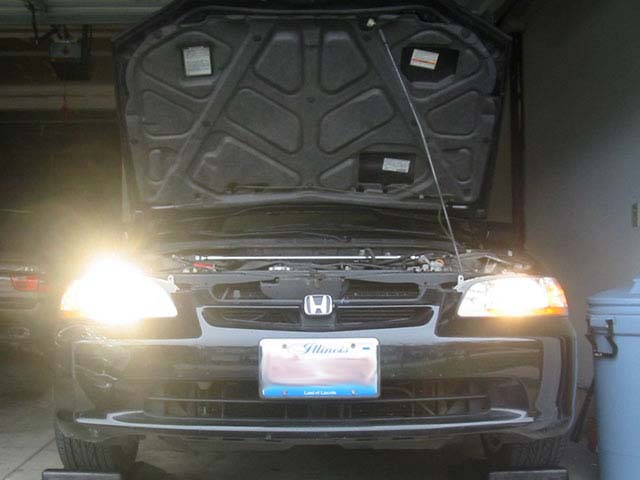
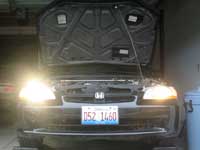
| Here you can see the difference between the new and
stock bulbs. The one on the left is the new one and it is much brighter.
It is also much whiter, though you can't tell that much in the picture. |
|
 |
|
| |
|
|
| |
|
|