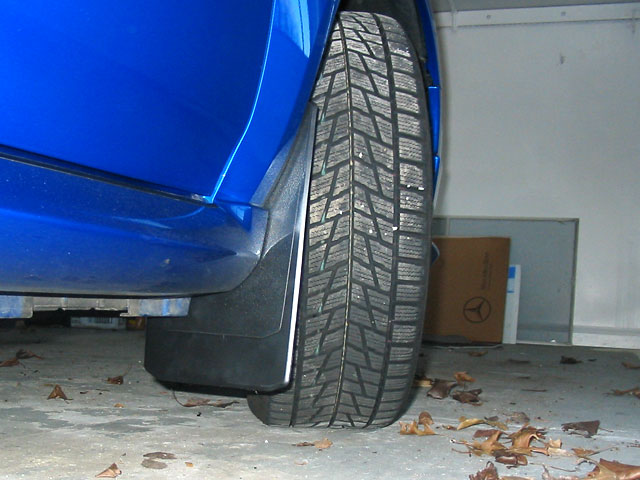
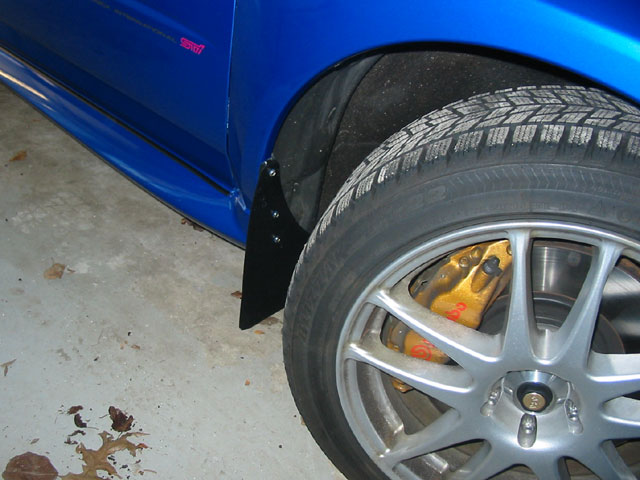
Decided I wanted to put some mud flaps
onto help keep the car marginally cleaner and so less debris would
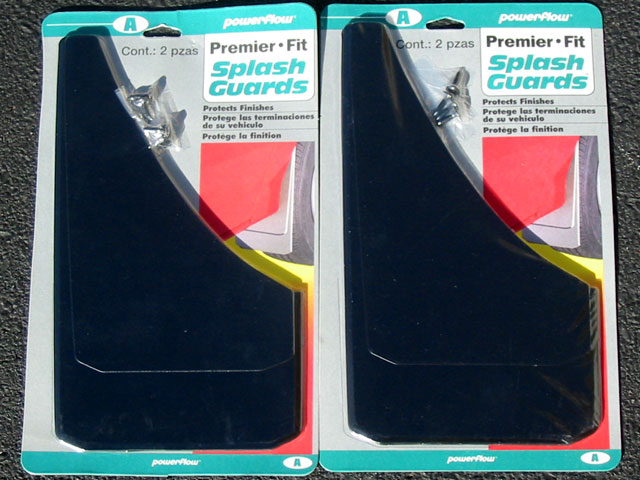
scuff up the sides of the car. Official STi mud flaps run about $300,
although you can get all sorts of other WRX specific flaps from $90
and up. But, I decided to be cheap and pick up some flaps for $3.99
at autozone.
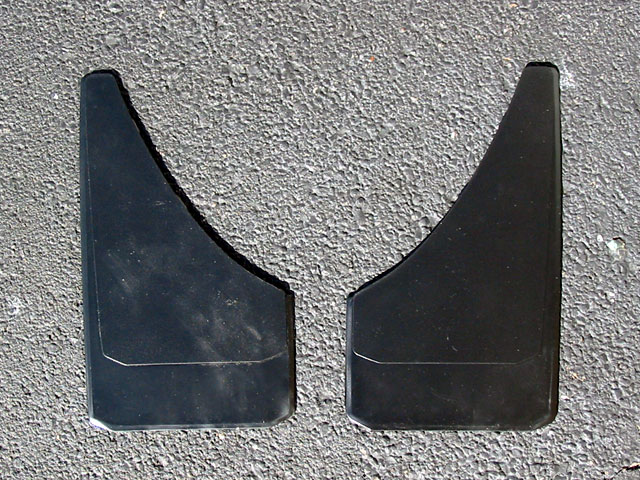
Nice, low-key black mud flaps. Here they
are out of the package.
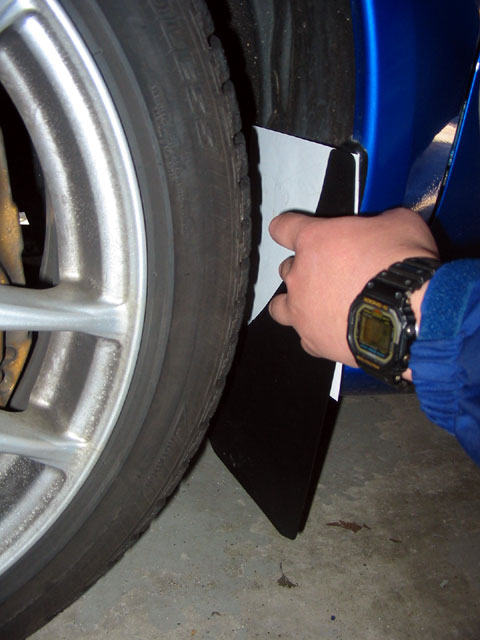
There are already holes in the wheel wells
where you can attach mudflaps. I put a piece of paper behind the flap
and positioned the flaps like I want them. Then, while holding the
paper, I can mark where the holes are.
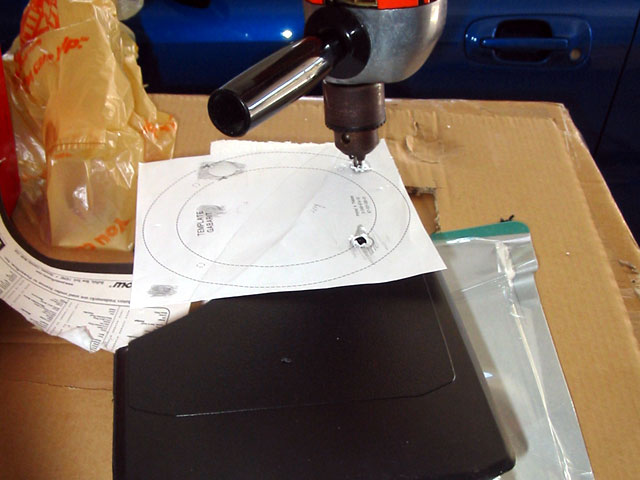
Then using the paper template, drill holes
in the flaps. The holes in the car are 1/4" but since I'm using
anchors, I had to use a slightly larger bit to make the anchors fit.
Now, take out the three screw-pegs in
the front wheel wells. For the top two pegs, use a Philps screw driver
to unscrew it about 1/4 turn. The center peg will pull out a little,
but that's it. Pull it partially out with your fingernails. Then use
a standard screwdriver to pry out the entire peg.
For the bottom peg, it's supposed to be able to screw all the way
out, but mine wouldn't so again I just used my fingernails to pull
it out a little, then a standard screwdriver to pry out the entire
peg.
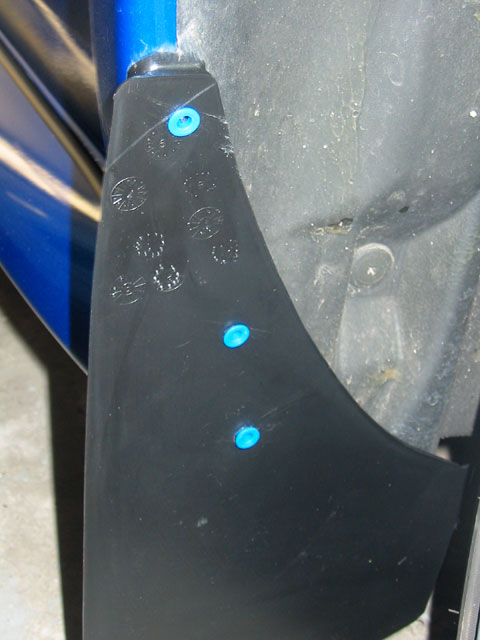
I used 1/4" drywall anchors designed for #10-12 screws and
they just happened to be blue. Line up the mudflap with the holes
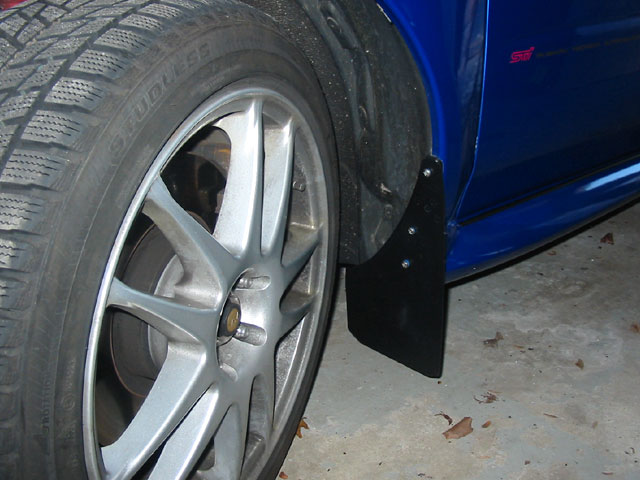
in the wheel well and put 3 anchors into the holes.
To make it easier to put the screws in, you may want to start the
car and turn the wheels to the left or right so you have space for
the screwdriver.
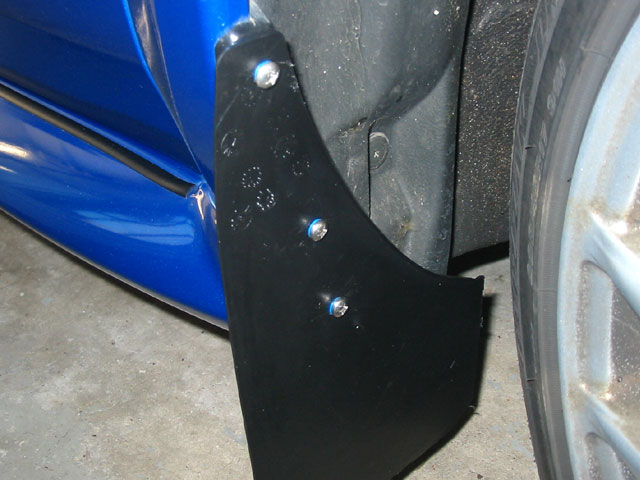
Next, take 3 screws and install them into
the anchors. I used #12x1" stainless steel screws.
If the anchors turn, use a pair of pliers to hold the anchor in position
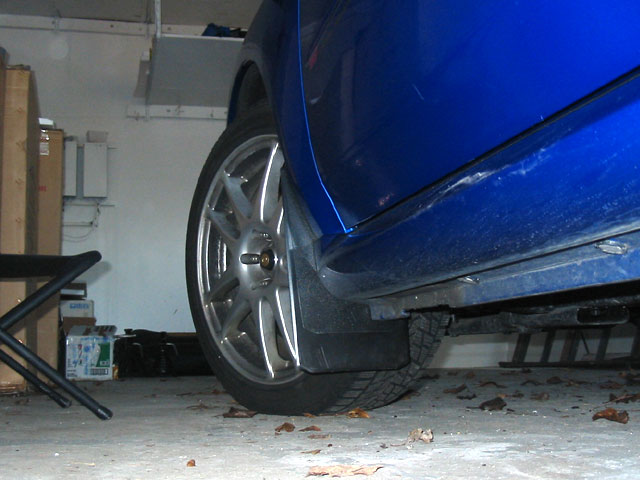
while you install the screws. That's pretty much all there is to it!