| |
|
Click an image to enlarge. |
I talk about sway bars Accord Rear Sway Bar DIY so I won't talk much about theory here. On the STi, the RSB will make the rear slide more in a turn making the car handle more neutral but you're not actually improving turn-in that much due to the large amounts of understeer in the stock set-up. As a result, I chose a 24mm adjustable RSB which is on the more aggressive side but not too much (27+ mm are available). This will be paired with a 27mm front sway bar to help the car turn. Note that a larger FSB usually increases understeer but due to the McPhearson strut geometry on the Impreza platform, the understeer generally caused by a stiffer FSB is surpassed by the improved camber geometry that reduces understeer.
This is a fairly straight forward installation, though it can be made more difficult based on the age and amount of corrosion on your car. Since my car is older, it took much longer (2-3 hours) than it would if your car were new (1-2 hours).
Note, due to installing the end links incorrectly, I spent an additional hour correcting that (see bottom posts). |
|
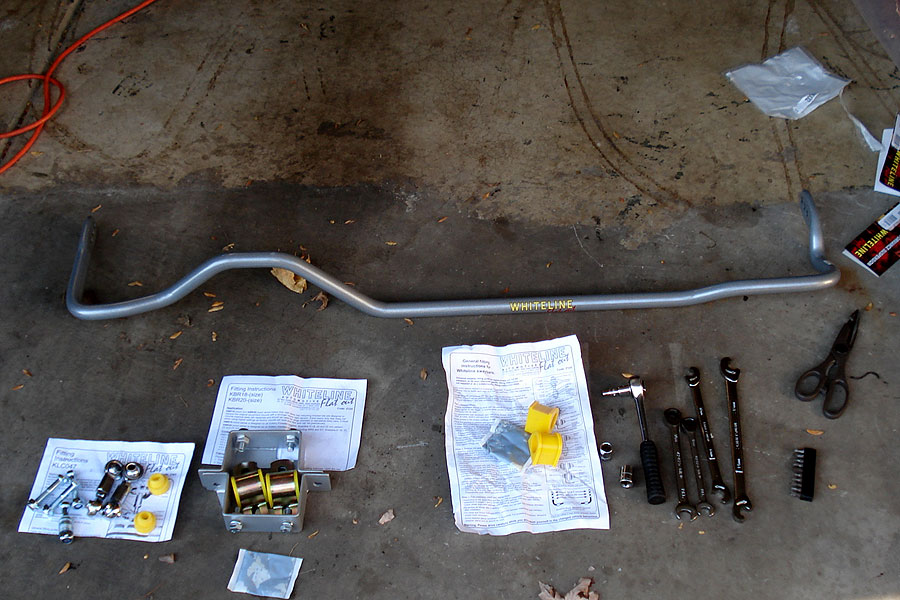
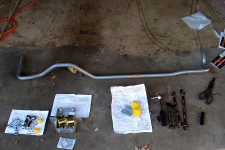
Here's what you need:
New Sway bar, bushing and grease
New end links (optional)
New mounting brackets (optional)
Ratcheting wrench and array of sockets (12mm, 14mm, 17mm) and extensions.
Array of open end wrenches (12mm, 14mm, ratcheting if possible)
Clamping wrench (e.g. Vise Grips) only if needed for "brute force" method
PB Blaster or other penetrating lubricant |
|
 |
|
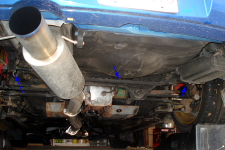
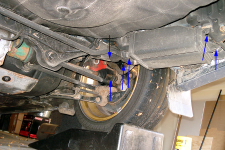
Get the back of your car onto ramps. This is preferred over jack stands b/c the sway bar is best installed with the suspension fully loaded with the car's weight.
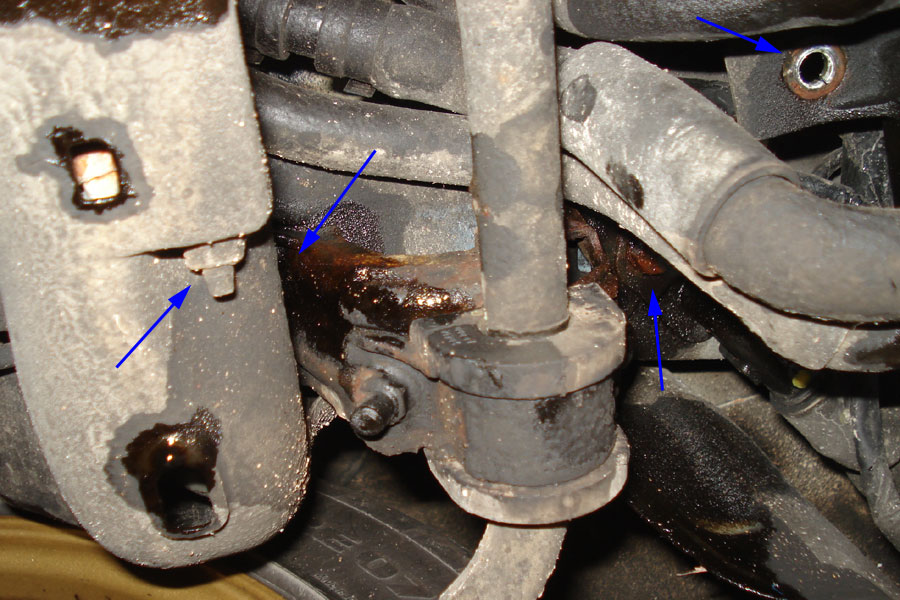
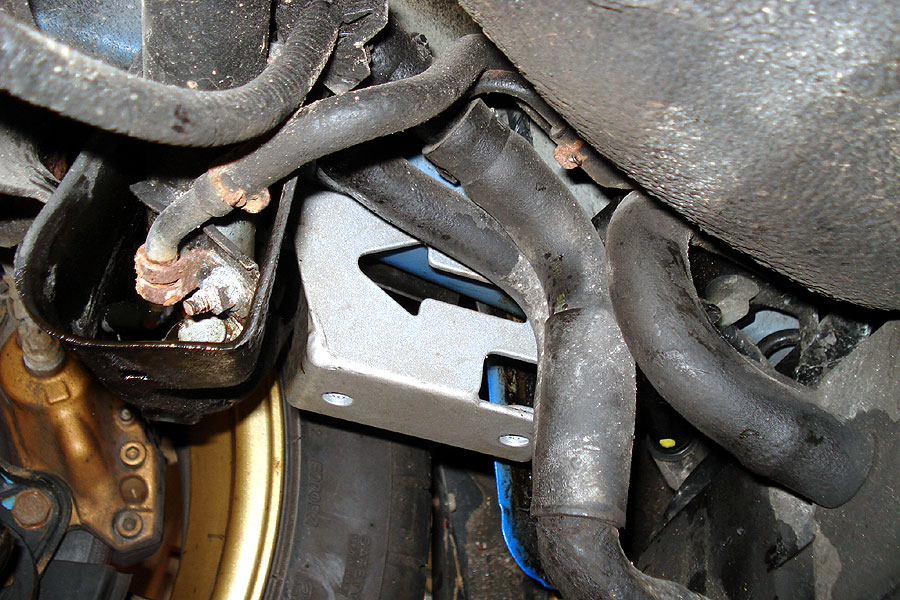
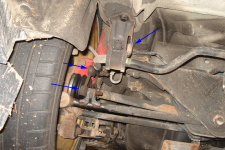
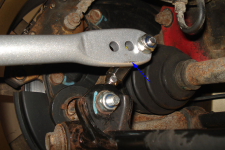
From the back, there are three major points of interest. The middle arrow indicates the sway bar and the two side arrows indicate the mounting points.
Take this opportunity to soak all the bolts (listed below) in PB Blaster, you may want to let it soak overnight as well. |
|
 |
|
| The right (passenger) side is more difficult due to the fuel fill line and this large plastic box that block the sway bar mounting bracket. In this picture are the 6 bolts for the right side. On the left are the two end link bolts. In the center are a bolt holding a plastic cover for the fuel fill line and a bolt for the black box. On the right side are the two rear bolts for the black box. |
|
 |
|
|
Removing the two rear bolts from the black box is easy. After removing these, I used a twist-tie to hang the box by the tow hook so it wasn't hanging from the hoses on the front side.
|
|
 |
|
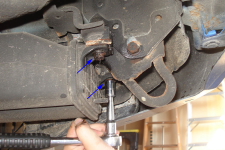
The front bolt for the black box is fairly easy as well (right arrow). Having an extension will make it a little easier as the hoses may be slightly in the way.
The left arrow indicates one of the mounting bracket bolts that is difficult to reach. |
|
 |
|
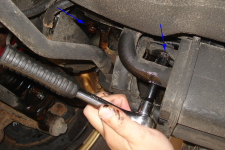
Here is another view of this area. Here you can see where the front bolt for the black box was removed (upper right arrow).
The left arrow shows the bolt for the plastic fuel fill line cover which needs to be removed next.
The center two arrows show the two mounting bracket bolts. |
|
 |
|
| Once the fuel fill line cover bolts has been removed you can bend the plastic cover out of the way so you can reach the front mounting bracket bolt. With the black box loose now, you can access the other mounting bracket bolt as well. |
|
 |
|
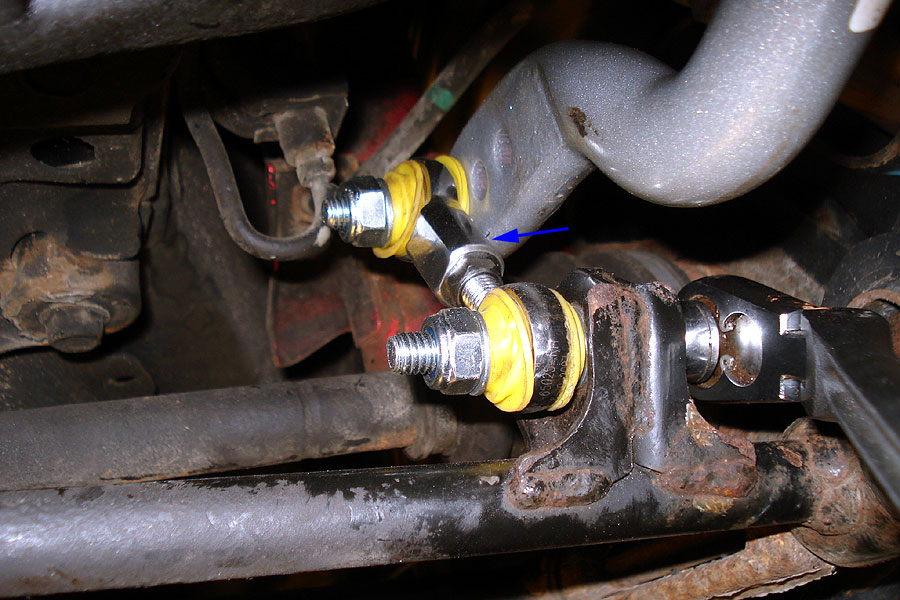
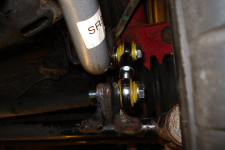
Now you need to remove the end links. I replaced the end links so I only needed to remove the end links from the stabilizer bar, but if you are re-using the stock end links you'll need to remove them from the sway bar instead.
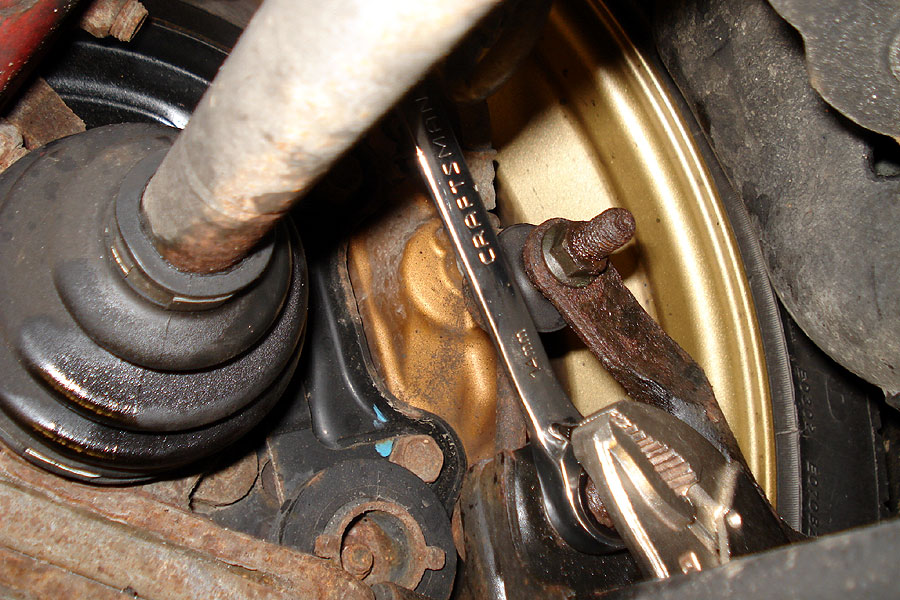
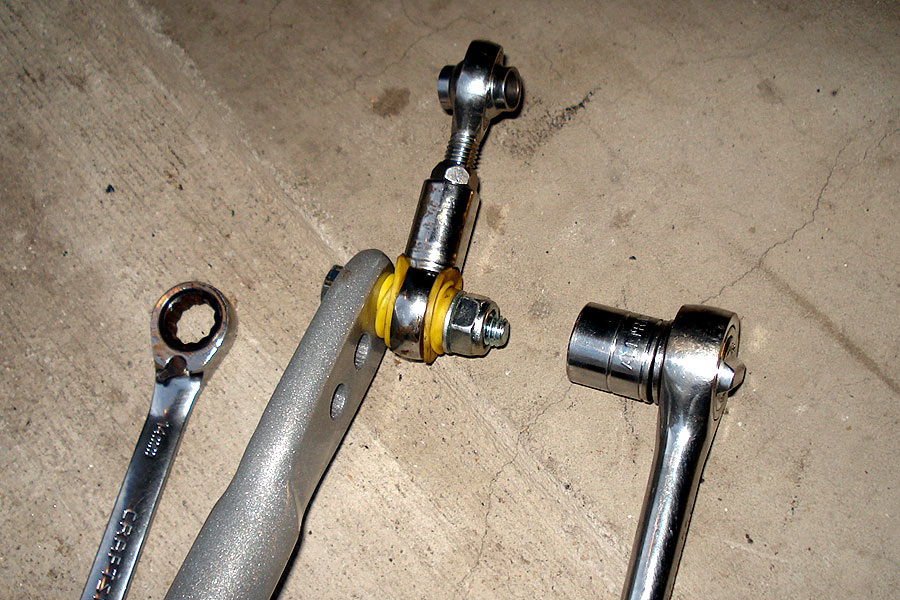
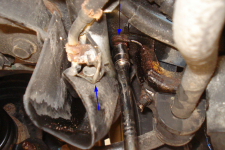
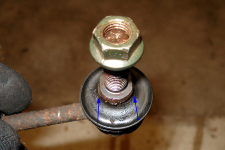
Here is a close up of a stock end link. The end link bolts are designed to move with the suspension so if you attempt to turn the 14mm nuts, the entire bolt will turn as well.
The proper way to remove it is to use a wrench on the "head" end of the bolt. You can see a collar which has been cut to accept a 14mm wrench (arrows in picture). Use this in combination with a wrench or socket. |
|
 |
|
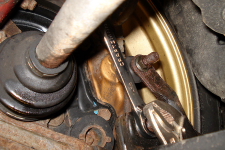
In my case, I didn't know about the collar on the other side, so I went with the brute force method which will damage the end link bolts (which is okay if you're replacing them).
Get a pair of clamping pliers (Vise Grips) and clamp it real hard to the threads of the bolt. Then use an open ended or ratcheting wrench to turn the nut while holding the bolt in place, using more PB Blaster as needed. |
|
 |
|
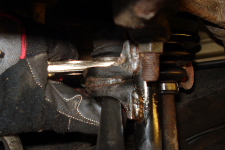
Eventually, you will loosen the nut to the point that the vise grips are blocking the remaining threads. At this point, move the vise grips to the head end of the bolt and continue on your way with the nut. Most likely you will have destroyed the remaining threads but a little muscle will get the bolts all the way off.
Again use PB Blaster as needed. You may notice the nut is now quite warm due to the friction... but you should be done. |
|
 |
|
On to the left side. This will be much easier as there is nothing in your way on this side. Otherwise it's pretty much the same, except you may want to remove the end links first as keeping the last bracket will give you a little more support when wrenching on the end link nuts. Keep the bracket bolts to use with your new brackets (unless they provided replacements)
Once the end links and brackets are removed, you will probably want to free the sway bar from the bracket to make it easier to remove as you will need to pull it sideways over your muffler and the bracket makes that difficult. Make note of the orientation of the stock bar as you'll want to match the orientation of the new sway bar.
|
|
 |
|
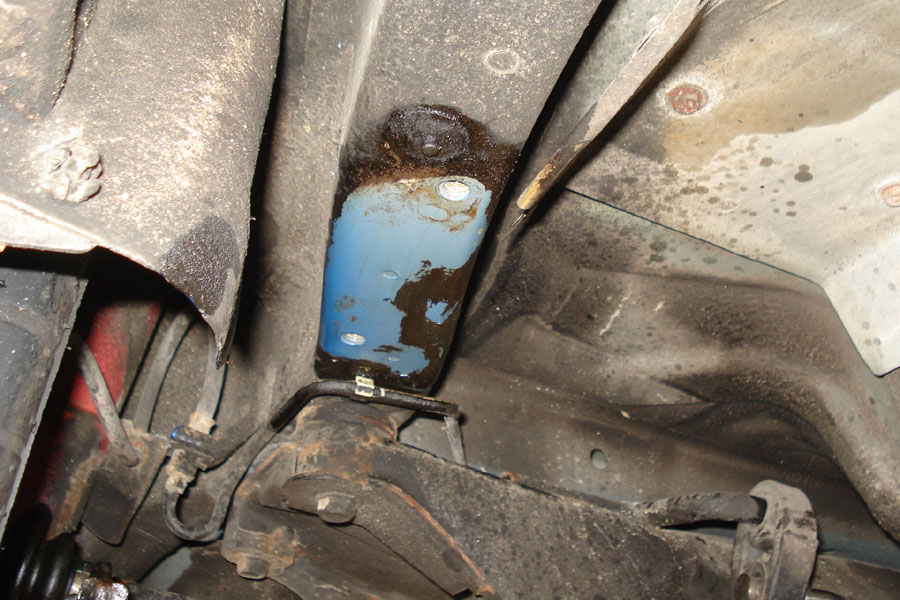
Once the sway bar is removed, clean up the mounting point. This picture is of the left side. Mine is especially gross b/c the dealer sprayed on a rust inhibitor. I cleaned it as much as I could with just a rag.
Then mount the new brackets according to the manufacturer instruction (check correct orientation and re-use the stock bolts unless replacements are provided).
In the case of the WhiteLines, the brackets have arrows that should point to the front and be located on the side facing the center of the car. |
|
 |
|
| Here is a picture of the right side with the new mounting bracket installed. |
|
 |
|
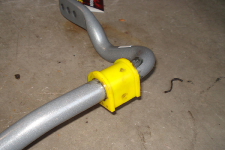
Take your new sway bar bushings and lubricate them generously with the supplied grease then slip onto the ends of your new sway bar.
Also fit the D-bracket over the bushing. The D-bracket will attach to the mounting bracket under the car |
|
 |
|
While you're working on the bar, install the end links as well. If using new adjustable end links, set them to the same length as the stock end links.
Here is an endlink installed on the bar according to manufacturer instructions However, on my 2004 STi I had to put the end links on the outside of the sway bar, not in the inside per instructions.
Either way, make sure you use the appropiate seals and washers in the appropriate configuration (e.g. the seals also go directly onto the end link spherical bearing and a washer always goes on after the seal).
The Whiteline rear bolts have a 14mm head and a 17mm locking nut (not that these are different from the front) |
|
 |
|
| Next, feed the sway bar into position over the muffler and attach the D-brackets to the mounting brackets with the supplied bolts. |
|
 |
|
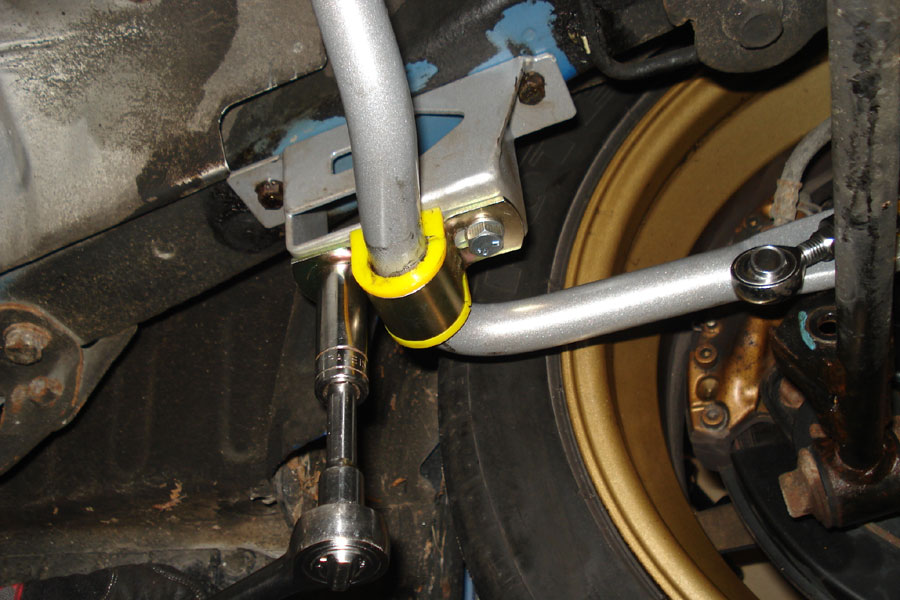
Line up the ends of the sway bar so that the end links line up with the stabilizer bars. If using adjustable end links, ensure they are the right length to fit easily, then install with the appropriate seals and washers, per manufacturer instructions.
Note again that these end links are installed on the inside, they should be installed on the outside. |
|
 |
|
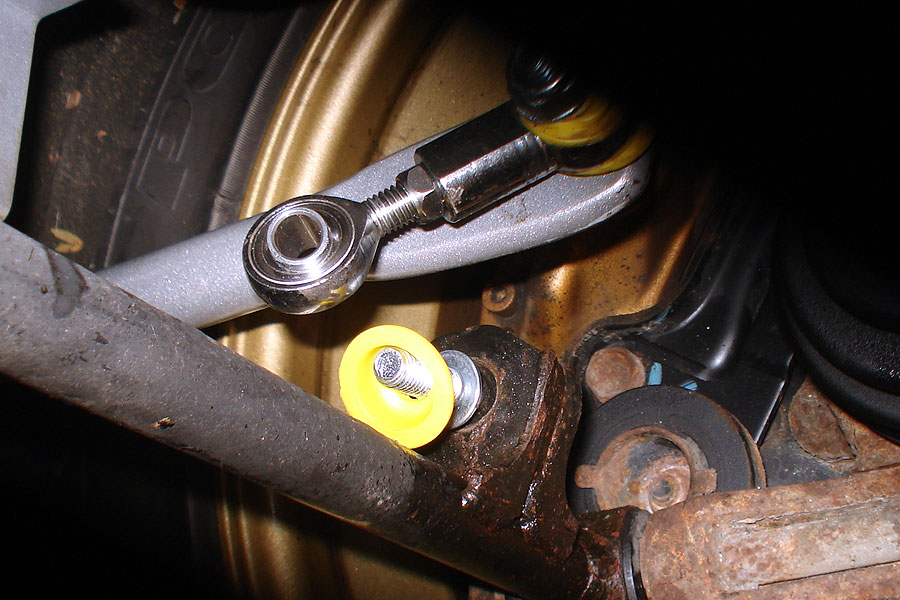
Tighten the end link bolts, then replace the fuel filler cover and the black box and you're done!
Note again that these end links are installed on the inside, they should be installed on the outside.
You can see why here: the end link is rubbing slightly on the sway bar due to the angle. |
|
 |
|
Note again that these end links are installed on the inside, they should be installed on the outside.
Here's a close up of the end link on the other side, which is also rubbing the sway bar. This resulted in some bad clunking when I drove it so I had to go under and switch both end links from the inside to the outside. |
|
 |
|
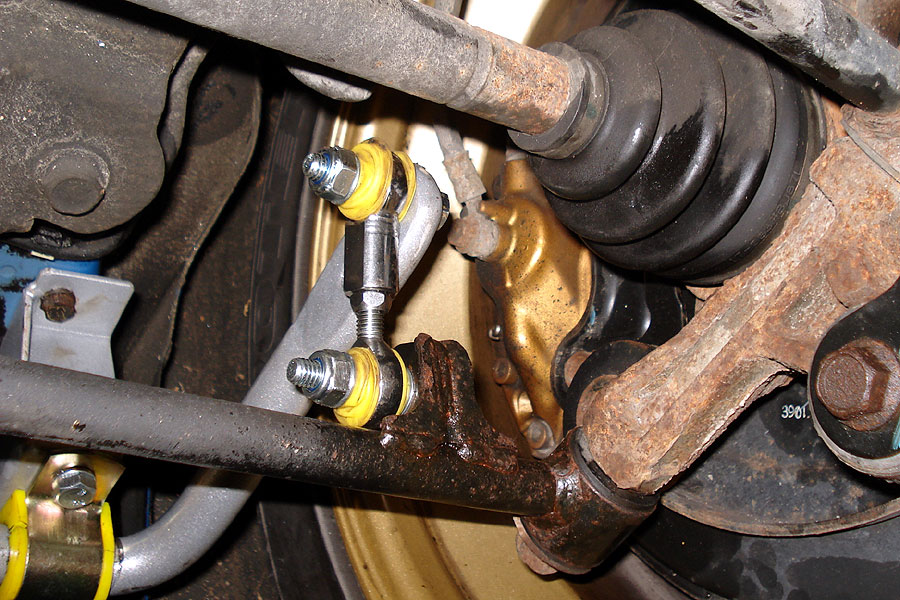
| Here is the proper installation with the endlinks on the outside. You can see here where the rubbing/clunking was coming from. The arrow indicates where the end link was rubbing away paint. |
|
 |
|
| Here is a view of the proper outside installation on the left side. |
|
 |
|
| Here is a view of the proper outside installation on the right side. |
|
 |
|
| |
|
|