| |
|
Click an image to enlarge. |
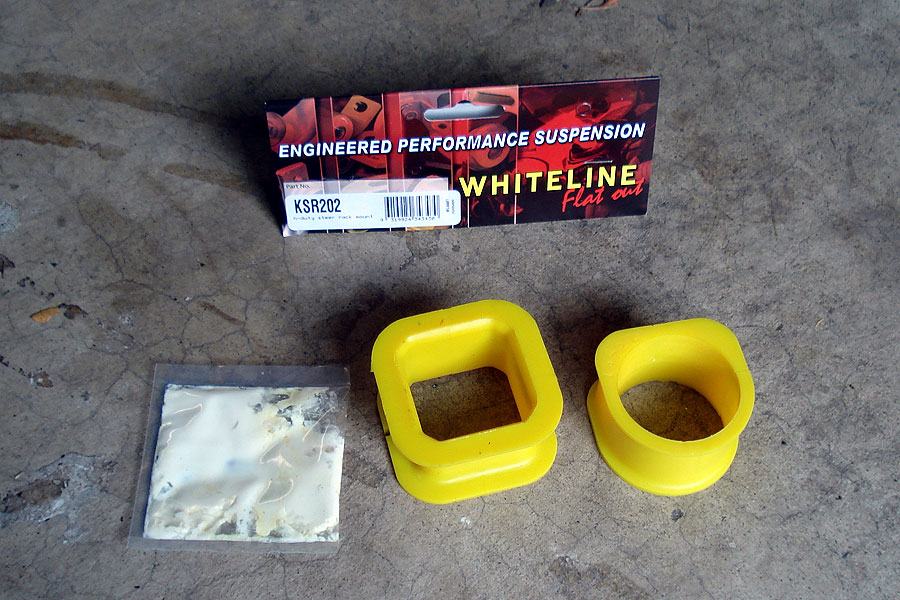
Some people have complained that the steering on Imprezas isn't as responsive as it could be, the main reason being that the steering rack is mounted with extremely soft rubber bushings. Upgraded polyurethane bushings is a cheap solution, but the DIY is a bit of pain.
This is an annoying installation. It could take about 2 hours if doing it alone, but it requires you remove some of the same parts as a Front Sway Bar upgrade so doing it at the same time as that would only be an hour. |
|
Here's what you need:
New steering rack bushings
Ratcheting wrench and array of sockets (10mm, 12mm, 14mm) and extensions
Array of open end wrenches (10mm, 12mm, 14mm, ratcheting if possible)
PB Blaster or other penetrating lubricant
Utility Knife
Pliers or screw driver |
|
 |
|
Get your car onto ramps or jack stands.
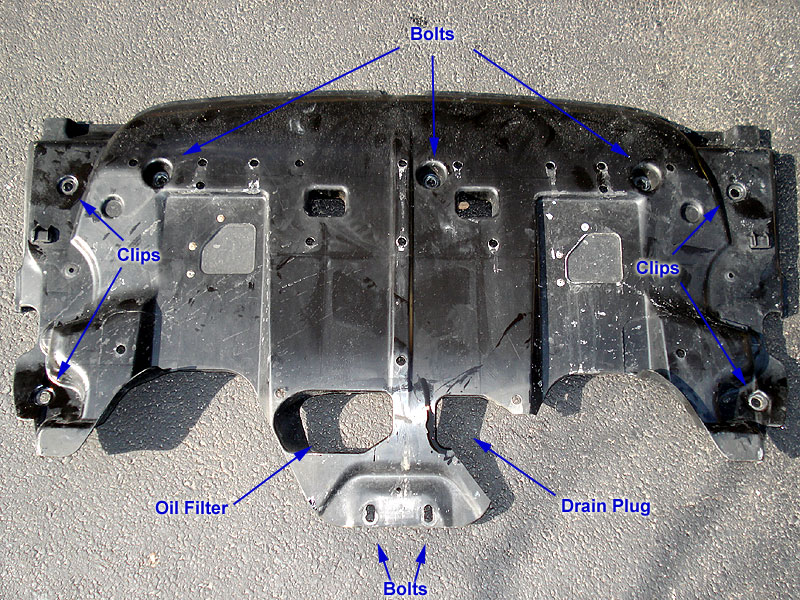
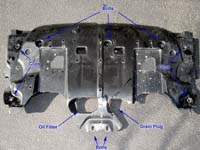
Remove the under tray. See my oil change DIY for info on removing the under tray. |
|
 |
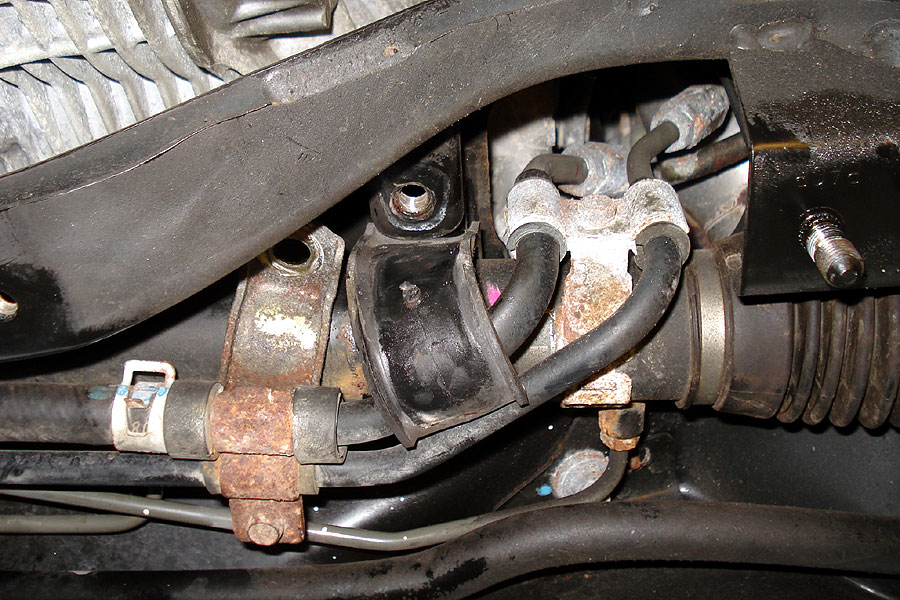
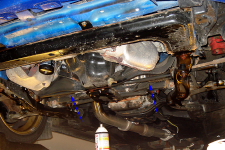
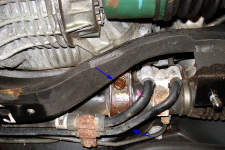
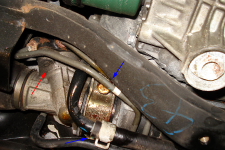
| This picture shows where the steering rack is located. The arrows point to the steering boots so you have some reference points. |
|
 |
|
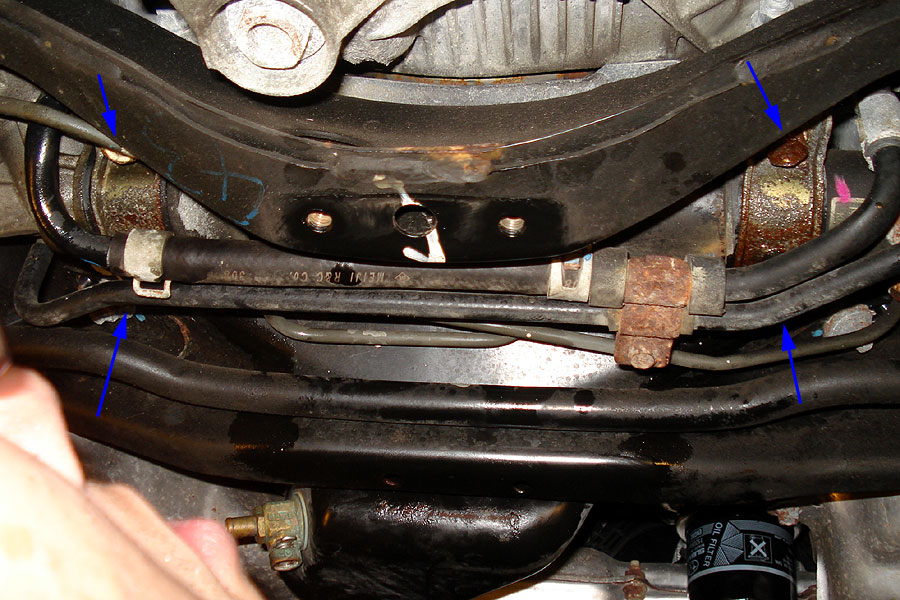
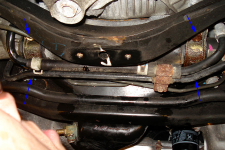
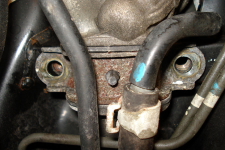
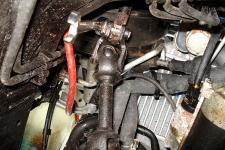
| Here is a close-up from under the car. The arrows point to the four bolts holding the steering rack brackets. |
|
 |
|
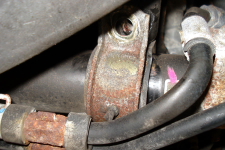
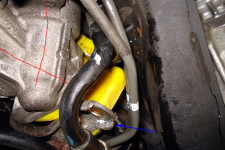
| Here is a close-up of the right (passenger) side bracket. The blue arrows show the two bolts hodling the bracket. |
|
 |
|
| The passenger side is easy, simply remove the two bolts. |
|
 |
|
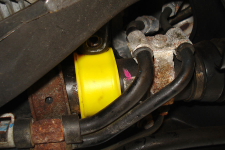
| You'll also notice a rubber tab sticking through the bracket. Cut this off with your utility knife. |
|
 |
|
With a little wiggling you should be able to move the bracket to the left and slide it off the rubber bushing.
You can use the screwdriver or pliers to help free the bushing if it's stuck, then go ahead and pull it out all the way.
The bushing is installed so that the open end is facing front so keep this in mind when pulling out the bushing. |
|
 |
|
|
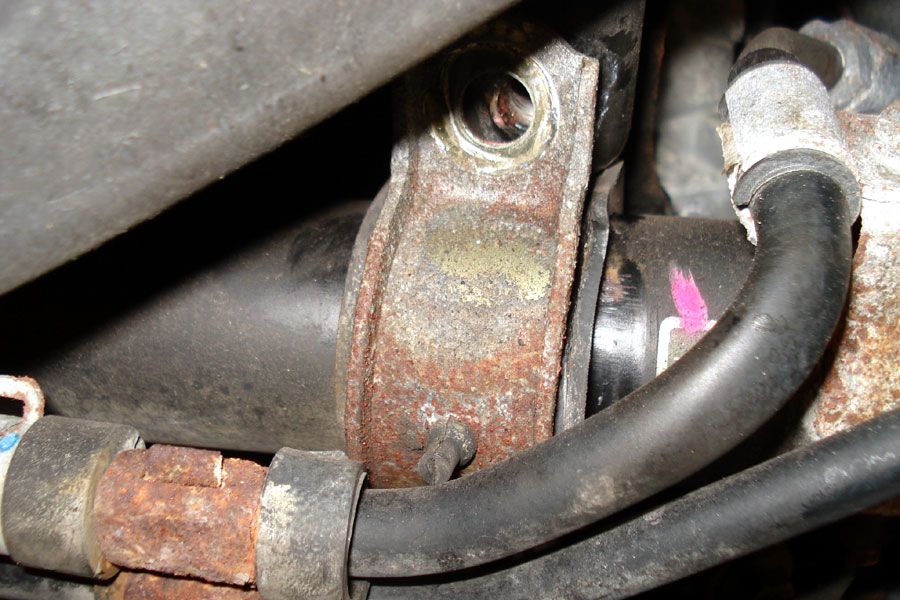
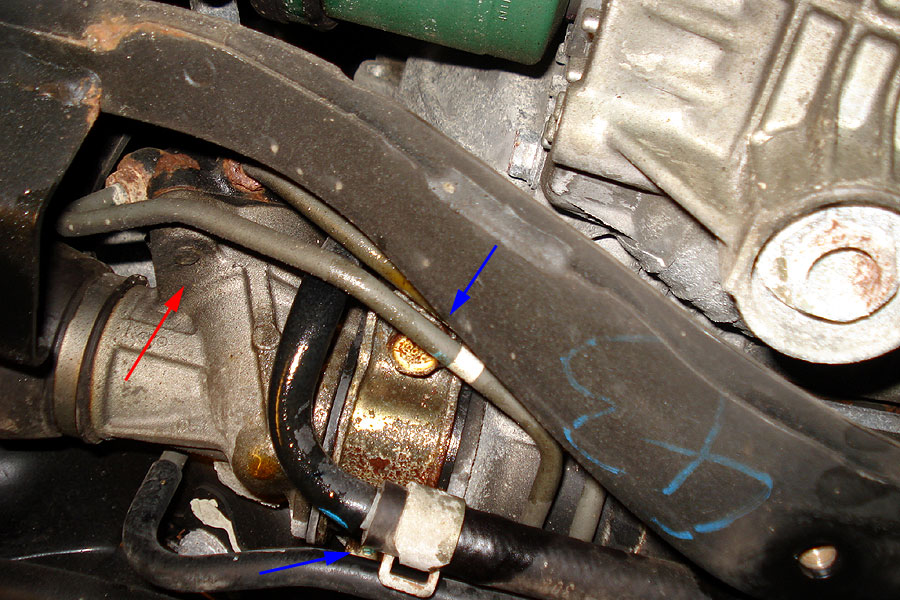
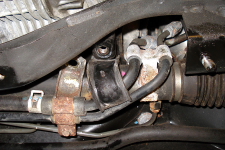
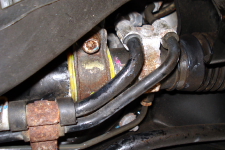
Here is a close-up of the left (driver) side bracket. The blue arrows show the two bolts holding the bracket and the red arrow shows the intersection of the steering column with the steering rack.
Note all the power steering lines that are blocking the bracket. These make the driver side bracket a huge PITA.
Remove the bracket bolts. You'll quickly find that the bracket doesn't have anywhere to go, making it very difficult to remove the rubber bushing.
|
|
 |
|
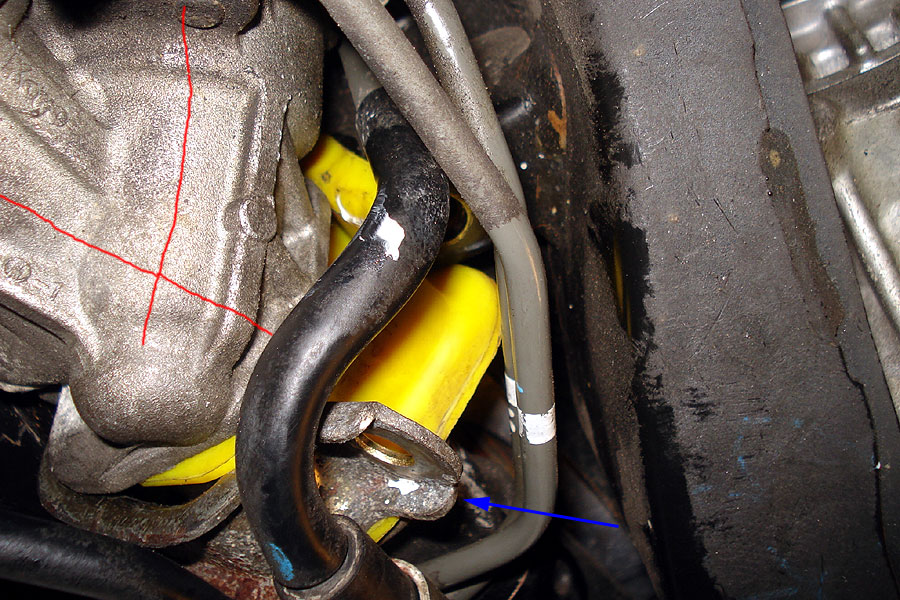
To give you a little more space to work with, it's best to disconnect the linkage to the steering column. There are two places to do this. I chose the top one because it's a little easier to reach and is keyed to only accept the linkage in one orientation.
Looking up from the ground, here is the linkage (that is the intercooler in the background). You'll see the bolt that can be removed and a cut-out into the steering column to accept the bolt. |
|
 |
|
Remove the bolt completely. For safe keeping I threaded it in the other way.
This will allow the steering rack to drop by about 1/2". It shouldn't separate completely but be careful as you don't want it to separate. |
|
 |
|
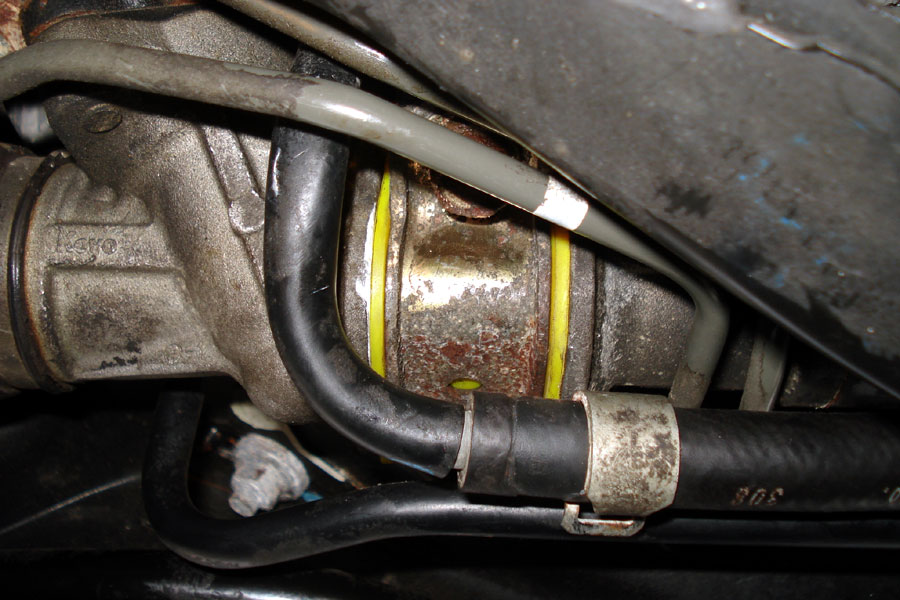
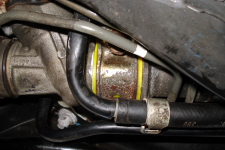
Do your best to loosen up the bracket now. You can wiggle the steering rack a little to help, but I couldn't get it all the way off. What I did was rotate the bracket towards the front to free as much space as possible, then I used pliers to pull on the rubber bushing until it came free.
Then, I basically did the same thing with the new bushing (the square one), feeding it into the space and wiggling the rack until I could get the bushing to slip into position. A little grease (supplied in the kit) might help as well.
Sorry I couldn't take more pictures but this was such a big PITA that I just wanted to get it done. |
|
 |
|
Next install the new bushing (rounded one) on the right side. This is a little easier, just feed it around the steering rack so that the flat side is against the top and the cut is in the front.
A little grease will help this line up as well. |
|
 |
|
When lined up, slide the bracket over the bushing and attach the bolts about half way.
|
|
 |
|
Return to the left side and attach the bolts on this side half way as well.
Check your steering linkage and make sure it is aligned properly, then tighten up both brackets for the steering column. When that is done, replace the bolt for the steering linkage and tighten that up as well.
That's it, you're done! |
|
 |
|
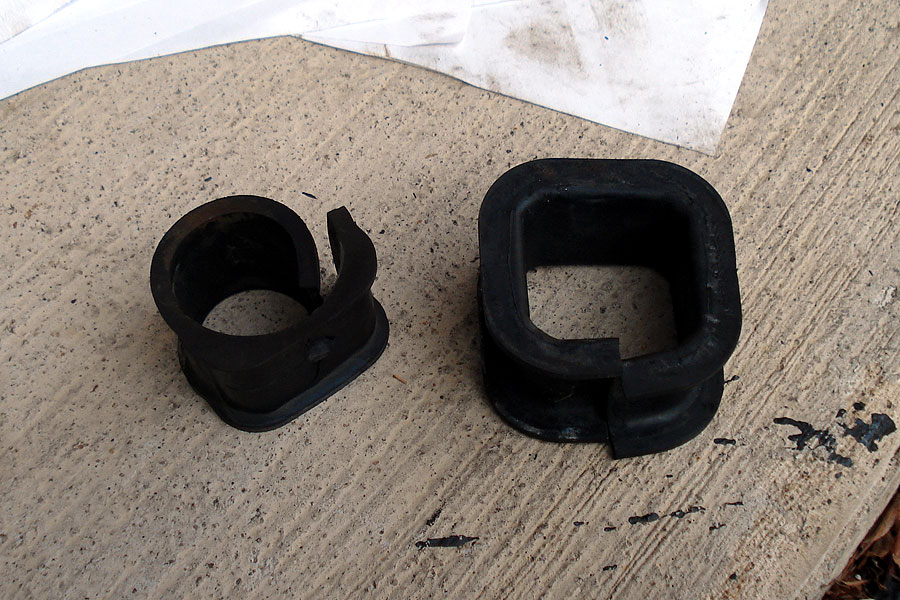
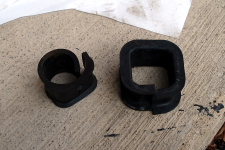
Here are the stock steering bushings. The fact that the passenger side bushing is already damaged (car is 6 years old but only has 18k miles) shows how soft they are.
On a side note, since the passenger side bushing is round, I actually cut it up and used it with a hose clamp on my Front Sway Bar to reduce sway bar walk. |
|
 |
|
| |
|
|