| |
|
Click an image to enlarge. |
|
| Here's what my kitchen looked like before
I moved in from the sink. I liked the kitchen because it's nice and
big with an island and it opens into the dining area. |
|
 |
|
| Here's another view from the door to the
garage. |
|
 |
|
| And a picture from the dining area. |
|
 |
|
| I decided to upgrade the kitchen by installing
a pot rack and track lighting. Here is a layout of the kitchen that
I put together to plan the upgrades. |
|
 |
|
| In order to hang the pot rack, I had to
use special drywall anchors since I couldn't find the studs in my
double-thickness drywall ceiling. A regular anchor creates a wedge
in a hole but that can't hold as much weight. Toggle bolts either
expand or have a cross bar that flips down behind the drywall. Here
you can see the ones I used which expand to create a large cross shaped
support. These can support 50 pounds each. These also accept 1/4"
bolts, which means a 1/4" eye hook will fit, and that's exactly
what I used. |
|
 |
|
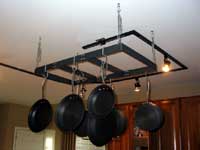
| Off the eye hooks I could hang s-hooks
and connect the chains for the pot rack. Here's what the installed
pot rack looks like. |
|
 |
|
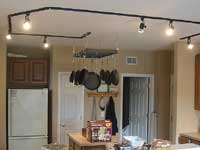
| The track lighting was easier b/c they are not as heavy so I could use regular drywall screws. The tricky part was holding up the tracks to the ceiling. Help from Ben made this possible. |
|
 |
|
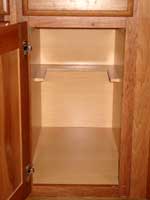
One thing I was surprised at was that my kitchen didn't have any storage space for cutting boards and cookie sheets. The one cabinet that would have been perfect had a shelf running through it which prevents larger boards form fitting.
Here you can see that cabinet, which I decided to upgrade. I've already cut out the shelf in this picture. |
|
 |
|
| With the shelf removed, I installed vertical separators and added some cutouts and sanded all the edges so you can easily get what you need without scratching yourself. I'm quite happy with it. |
|
 |
|
| Condo Tour
| Kitchen | Garage |
|
|
| |
|
|


