| |
|
Click an image to enlarge. |
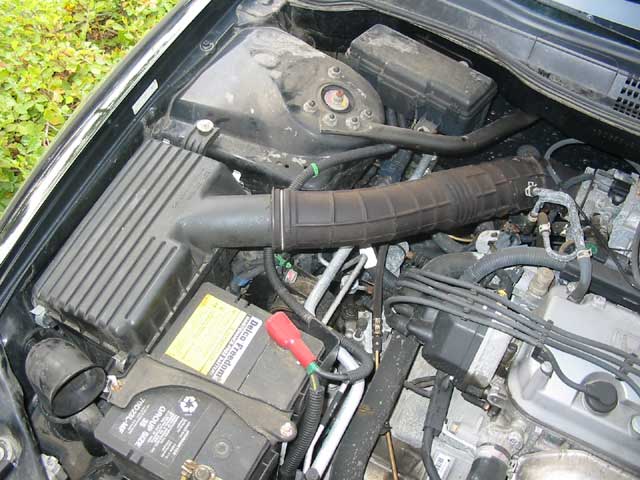
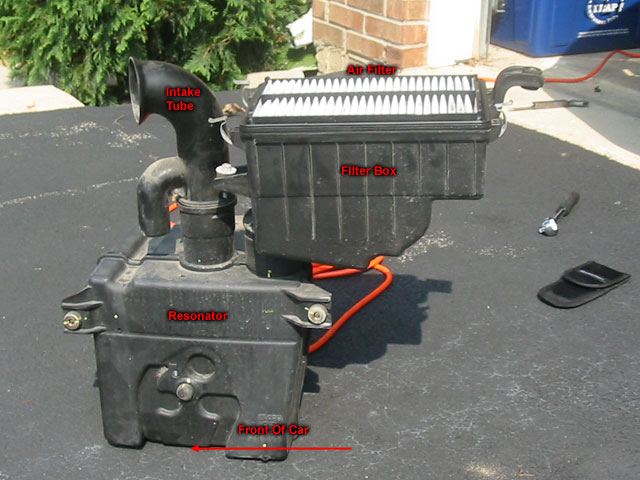
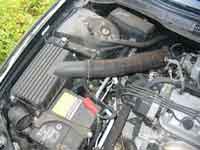
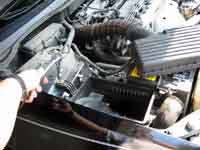
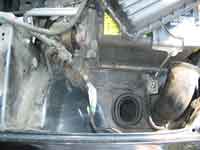
| Here you can see a close up of the stock
air intake pipe (the little round pipe at the bottom left by the battery).
Directly below it (not visible) is the resonator which quiets the
intake and leads back to the air filter box (the box next to the intake
pipe and battery) with a hose leading to the throttle body on the
engine. All of this will be removed. |
|
 |
|
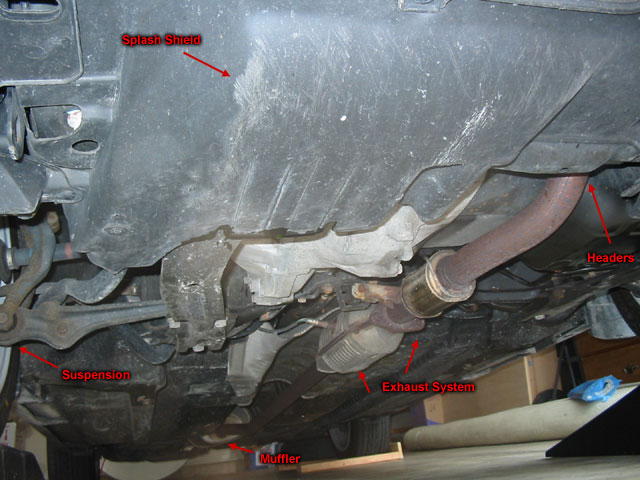
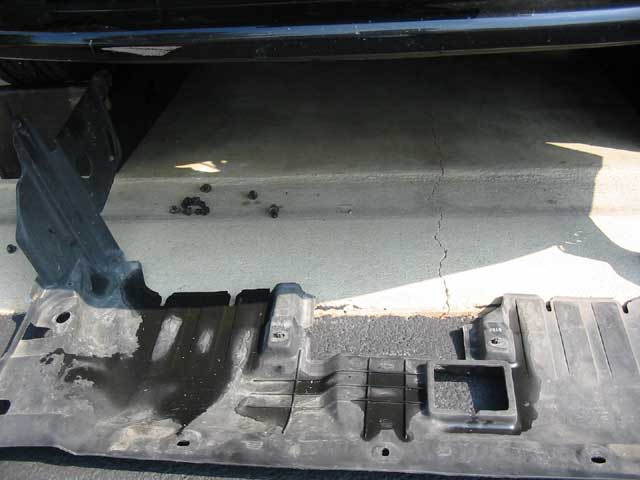
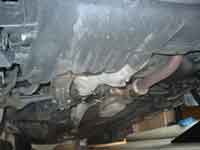
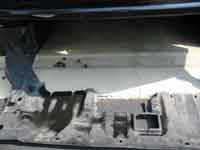
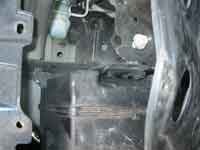
In order to remove the resonator and install
the new filter, you will need to remove the bottom center splash guard
and partially remove the right wheel well guard. In this picture you
can see the center splash guard.
|
|
 |
|
| For the wheel well, you will only need
to remove the part attached to the front bumper. After this it can
be folded out of your way whenever you need to access the space behind
the bumper. |
|
N/A |
|
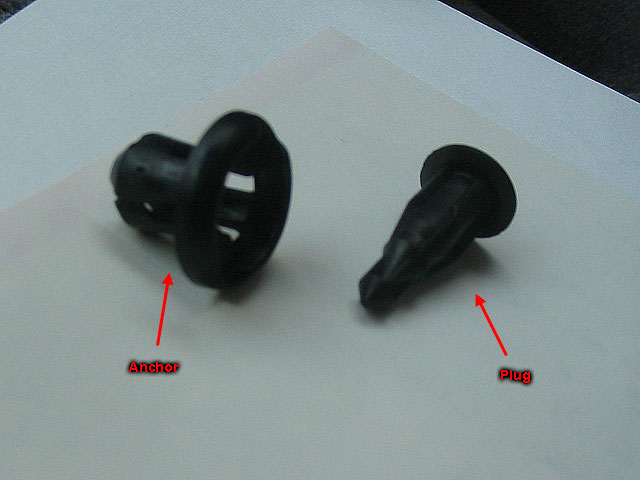
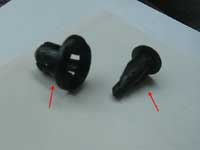
| The splash guard and wheel well guard
are attached by several fastening pegs and one screw on the right
side. Each peg is made of two parts. One part is the anchor which
is wider in diameter and is placed into the hole first. The second
peg is a plug which fits into a hole in the anchor and pushes the
peg apart, securing the peg in the hole. |
|
 |
|
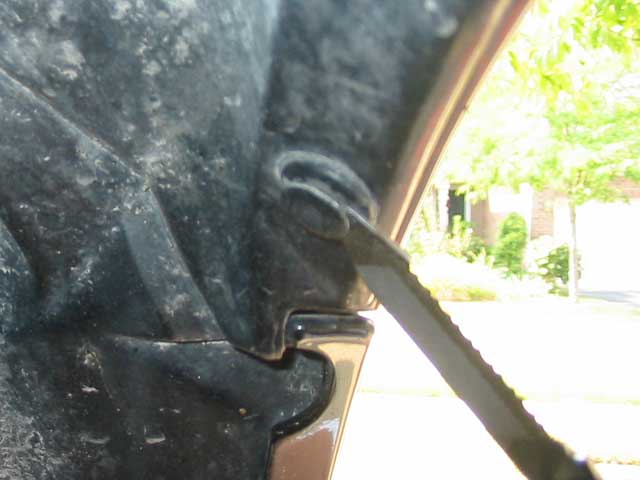
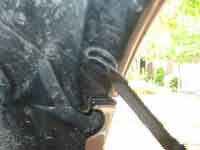
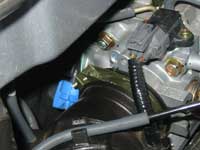
To remove these pegs, you must do the
opposite. Push a flat head screw driver between the edge of the plug
and the anchor. Work your way around the plug and pull it out at least
1/8", but preferably 1/4" or all the way out. The anchor
should easily come out now, but some of the pegs may be extremely
tight and if they are older you may break some of them. You can get
replacements from your Honda dealer for $1-3 each.
In this picture you can see me removing one of the pegs. |
|
 |
|
You will have to lay on the ground under
your car to find all these pegs. There's about a dozen of them. Two
are permanently embedded into the splash guard, but you can still
pull the inner plug partially out to release the anchors. Make sure
you've removed all the pegs before pulling the splash guard out.
Once you have removed all the pegs and the screw, you will be able
to remove the splash guard. If you find some parts hard to get out,
make sure you've found and removed all the pegs. |
|
 |
|
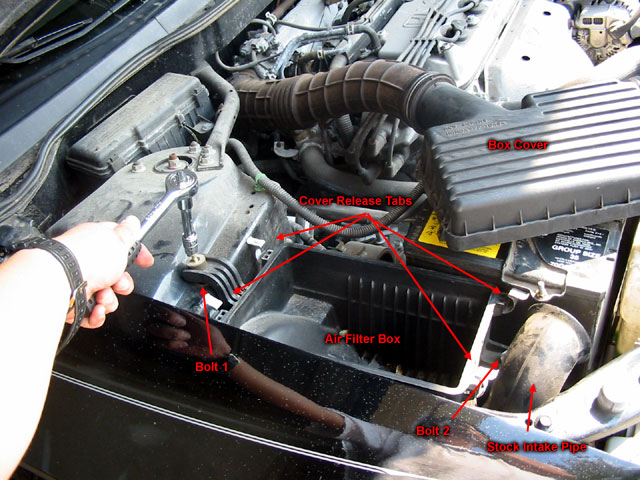
Take off the top of the air filter box.
There are four clips located around the filter box that can be easily
released with your thumb. Take the top off (still attached to the
air hose) and move it out out of the way. Inside you will see the
white crimped air filter. Remove this.
Using a socket wrench, remove the two bolts securing the filter box.
|
|
 |
|
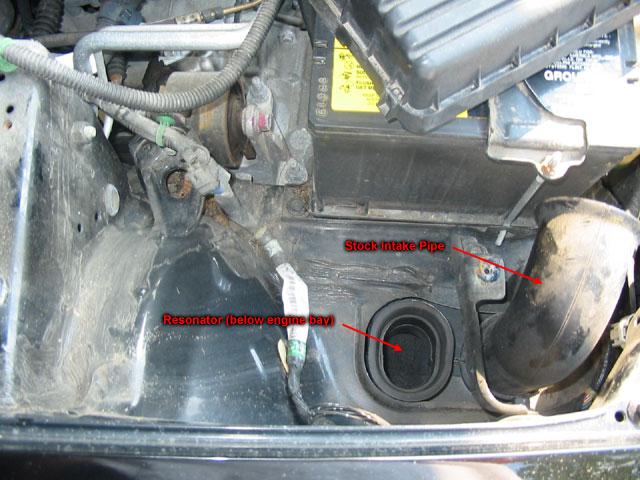
After the bolts are removed, you can simply
lift up on the filter box and it should come out easily. Looking in
the pit where it used to be, you will see a hole leading to the resonator.
You will also see the intake pipe still next to the battery.
Remove the intake pipe by twisting it 30-45 degrees in either direction
to unlock it, then simply wiggle it until it comes out. If you need
to pull a little hard, it's ok since it's pretty sturdy and you won't
need it afterwards anyway. |
|
 |
|
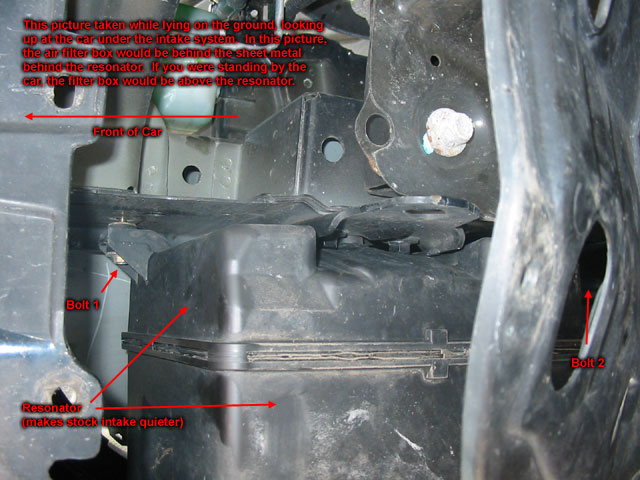
The resonator box is a little more difficult
to remove. To access it you will need to lay down beside your car,
close to the front right tire. There are two bolts holding the resonator
but they are in tight positions. If you have a smaller socket wrench
you can still get to it. If not you'll have to figure out a way to
do it, such as removing the rest of your splash guards or bumper or
just going out to get a different wrench.
Once you've removed the bolts, you can pull the box out, but it's
a big box and you have a very small hole, so it's a bit of a pain. |
|
 |
|
Here I have assembled about 2/3 of the
entire stock intake system. Pretty darn big, eh? It's surprisingly
heavy as well so I'm glad I got that all out of my car!
|
|
 |
|
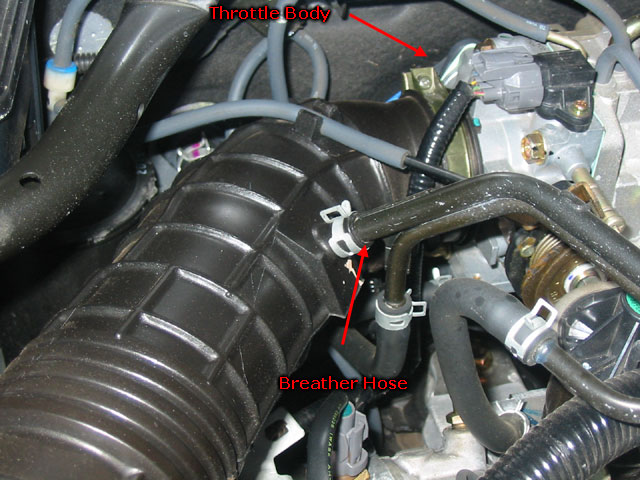
The last part to remove is the filter
box cover and hose leading to the throttle body on the engine.
Before you can do this, you must detach the small metal breather hose
connected to the main intake hose by using pliers to squeeze the hose
clamp. You should then be able to remove the breather hose. |
|
 |
|
| After this, you must loosen the main intake
hose from the throttle body. It's attached with a ring clamp, so all
you need to do is loosen the bolt on the clamp using a screwdriver.
Once it is loose, you should be able to pull the hose off. |
|
 |
|
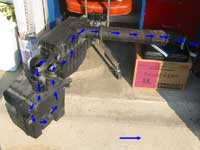
Here's the entire stock intake system
put together. I've added blue arrows to show you the flow of air.
The thing is HUGE!
Once you've completely taken out the system, you're ready to start
putting the new intake in. |
|
 |
|
| introduction
| preparation | installation
|
|
|
| |
|
|