ERROR
IN DIY - Please read this before reading this DIY and be aware of
the errors.
As I was testing out my CD player, I had a funny suspicion that it
wasn't turning off when I turned off the car. A week later, I got
in my car, turned the key and... nothing. Not a peep, not a click...
nothing. My clock didn't work, nor did my ceiling light! My CD player
had played all week until my car was completely dead! My error was
assuming that all the systems used the same color coding for wires.
This is incorrect. When dealing with electrical wiring, always double
check your color codes and make sure you are hooking up the correct
wires. |
|
| |
|
click for a larger image |
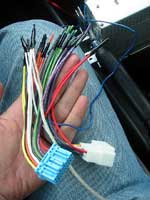
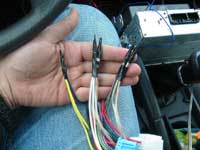
To simplify installation you can pick
up a set of pre-wired extension harnesses like these at Best Buy or
other car audio store. These cost about $15 each and fit perfectly
between the original harness and socket. All the wires are labelled
so you know what they do (ie main power, remote/auto-off power, ground,
left, right, rear, front speaker signals, etc.). You just plug these
into the harness and socket and then connect all the appropriate ends
to each other and tap the appropriate lines as necessary.
|
|
 |
|
When I installed the CD player, I needed to tap the
main power and the remote power (which turns on/off the radio when
you turn on/off the car). With the new sub-woofer, I decided to change
the power source to a large cable straight from the battery (more
on that later) so I only needed tap the remote power. However, I also
needed some signal wires to the new sub-woofer so I also tapped the
front left and right speaker signals (postive and negative so 4 wires
there).
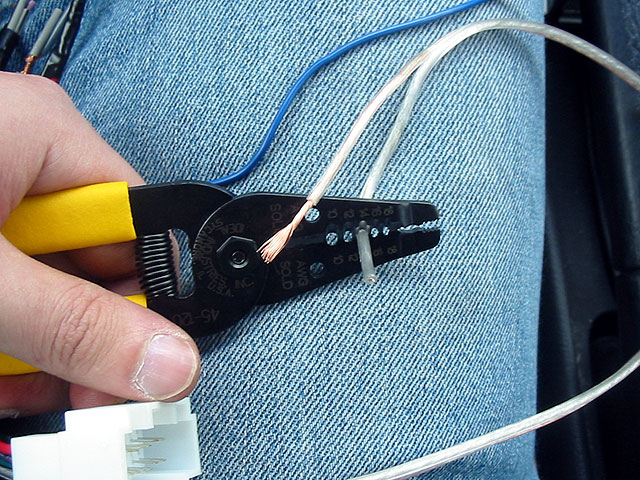
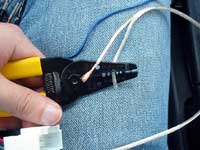
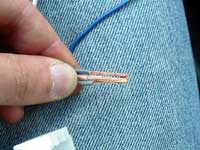
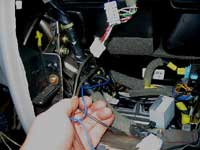
First thing I needed to do was strip the ends of the wires I needed
to connect. Here I use a wire stripper according to the appropriate
size. I always use one gauge (AWG) larger than the actual wire to
reduce chances of accidentally cutting some of the threads. Strip
1/2 - 3/4" of wire. |
|
 |
|
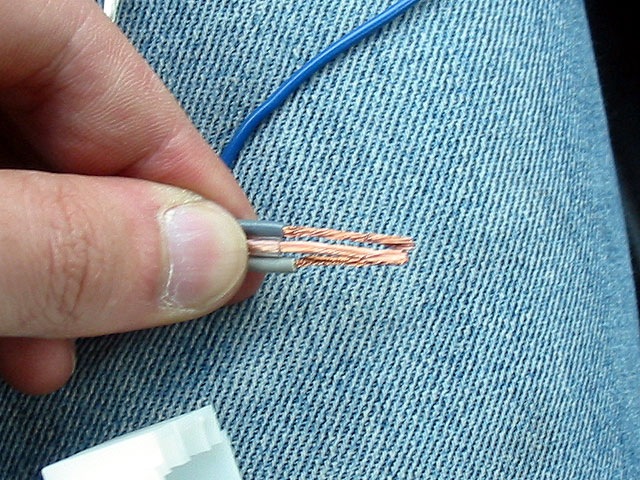
| Here are the three wires I need to connect.
In this case, this is one of the speaker signal wires. The new signal
wire that will go to the subwoofer is in the center. On the side are
the two wires from the new harnesses. |
|
 |
|
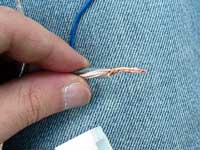
Since I'm running a fairly low power system
and it is not of any exceptional quality, a quick basic connection
is fine. All you need to do is twist the wires around each other and
you're good to go.
If you're anal, or are using a high quality/power system or just like
to play with power tools, you should solder these connections to provide a better signal that will
stay intact longer. |
|
 |
|
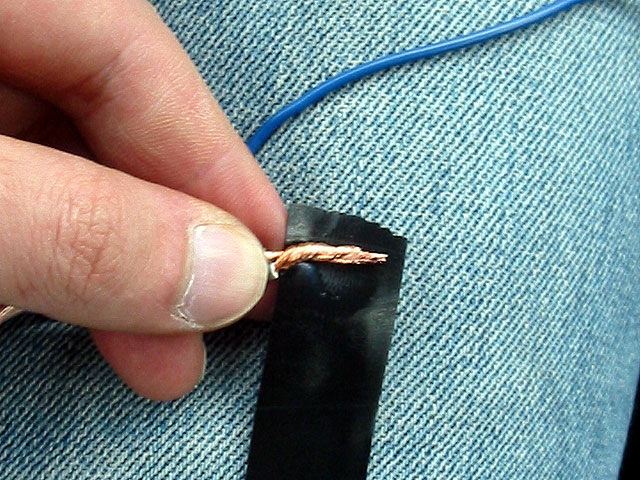
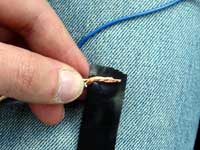
| Once you're done connecting the wires
you should cover them up to protect the connection. Electrical tape
is fine. |
|
 |
|
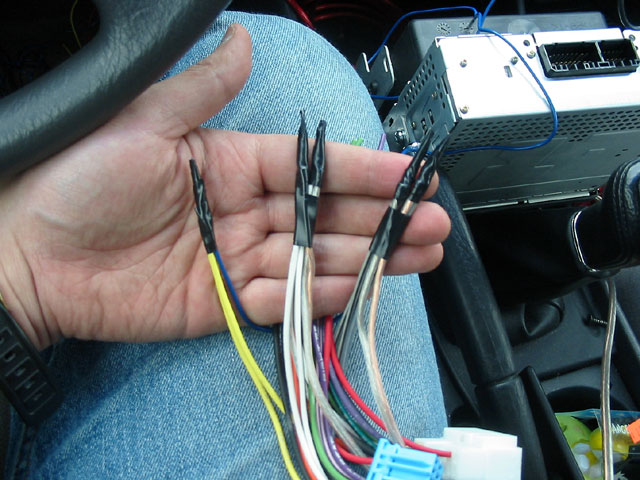
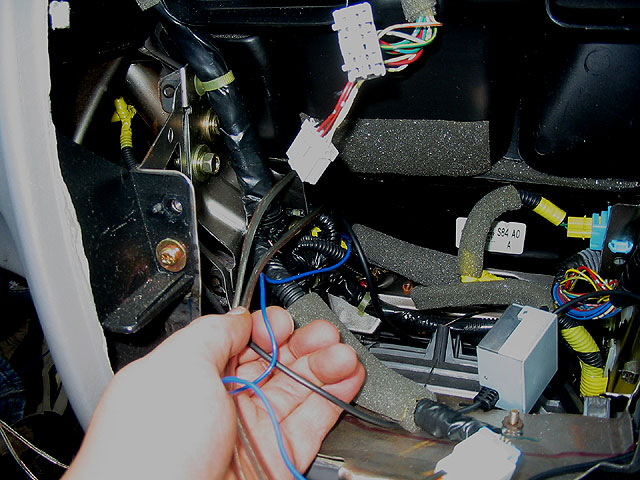
Here's what all my connections look like
after I'm done. I also wrap the wires away from the ends so they won't
get pulled apart by accident. Here you can see the remote power on
the left and the positive and negative, left and right speaker signals.
I also taped all the harness wires together to keep them neat. |
|
 |
|
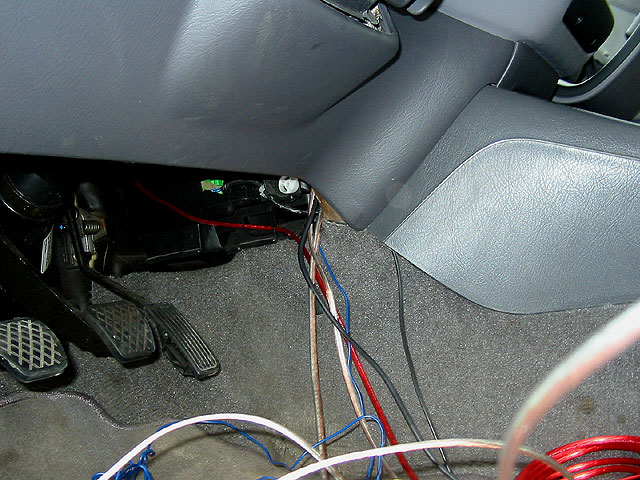
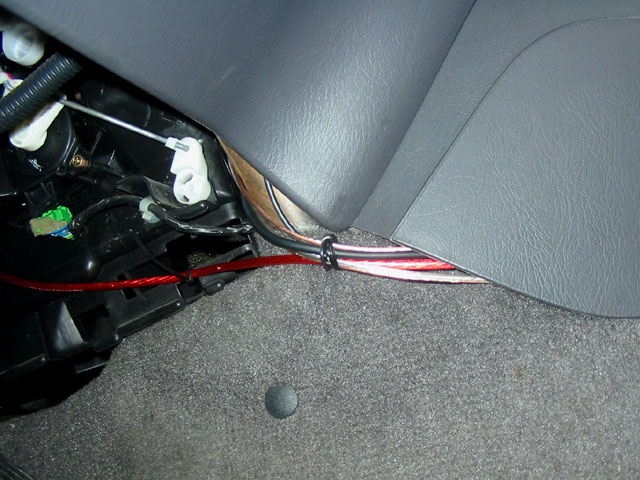
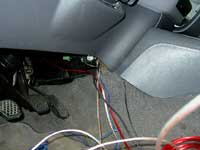
| Now run all the cables that need to go
to the trunk into the abyss. You can find some spaces on the left
or right side where the cables can come out of the center console
and down to the floor of your car where your feet would be. |
|
 |
|
Here you can see where the wires will
come out if you choose the left side.
One note that I was not aware of (and will need to fix later) is that
running your signal wires next to your power wires (the big fat red
cable) causes noise in the signal so I'm going to have to re-wire
all my signal wires to go down the right side of the car instead of
the left. |
|
 |
|
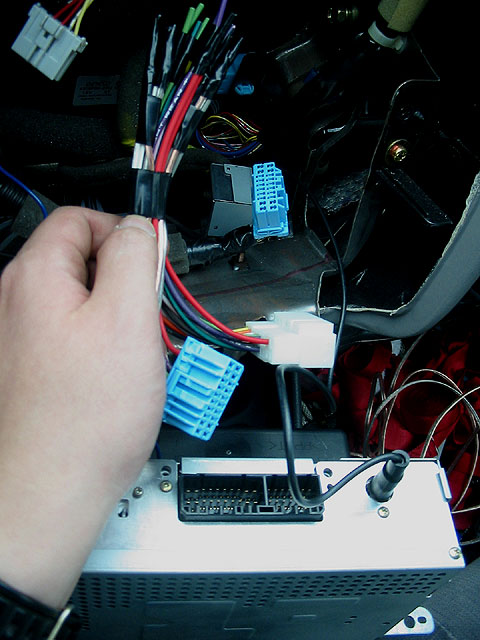
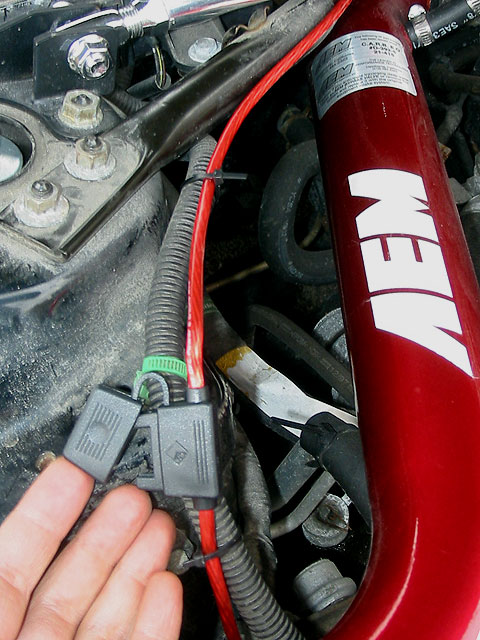
| Now you're ready to plug the harnesses
back in. Plug the new harness adapter to the head unit (blue connector
here) and the original harness to the other end of the new harness
adapter (white connector). |
|
 |
|
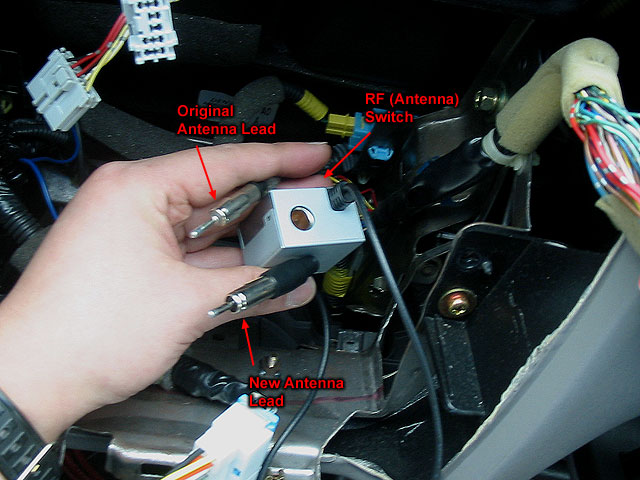
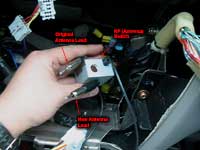
For my CD player, I also had an RF (antenna) switch
to install. It's a little metal box with a hole in it for the stock
antenna cable and a new antenna cable that plugs back into the head
unit. It also has signal cable that runs all the way to the CD changer.
Stuff the RF switch and the new harnesses all back into the abyss
and replace your head unit. You'll also want to pull the cables running
down to the floor a little to take up any slack. Screw down the head
unit and replace the console. (or you can leave it off in case you
need to check all your wiring) |
|
 |
|
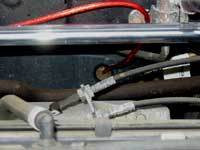
Since I'm running a subwoofer I need a
beefier power cable. I purchased a Rockford-Fosgate car audio power
kit that includes a 10 gauge main power wire, a 10 gauge ground wire,
an 18 gauge remote power wire (which I used to connect to the harnesses
above) and some zip ties.
The main power wire should be wired directly to the positive ("hot"
red) terminal of the car battery. First unbolt and remove the negative
(black) battery cable and separate it from the battery to ensure that
the circuit is "open" and no current is running. Now unbolt
the positive terminal and attach the end of the main power cable to
it. Replace and re-tighten the positive terminal. |
|
 |
|
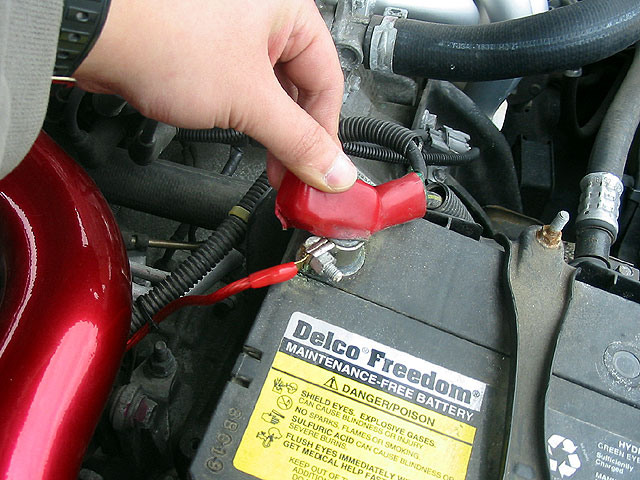
An additional note, the positive battery
terminal on my car has a rubber cover. I had to remove this cover
to access the battery terminal. I also needed to make a cut in the
terminal to best allow the power cable to fit.
The power cable comes with a fuse so that if too much power is drawn
it will blow the fuse instead of killing your battery (or something
worse like catching on fire). Here you can see that fuse point. You'll
need to zip-tie the power cable around other cables or non-moving
structural elements of your car. |
|
 |
|
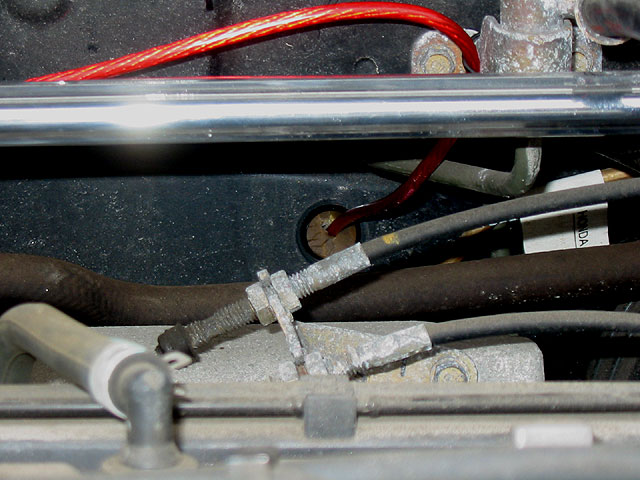
I had to find a way to get the cable
from the engine bay into the car. The engine bay is usually lined
with metal, followed by an inch of insulating material and then another
plastic lining in the passenger compartment. This is called the firewall
as it keeps out heat and fire and external elements from the passenger
compartment in the event of an accident or something. There are a
few pre-defined points in the firewall for running wires and such.
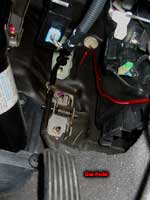
From the outside, it is located just above and to the left of the
hole where the gas pedal cable passes through the firewall. It is
protected by a removeable grommet. |
|
 |
|
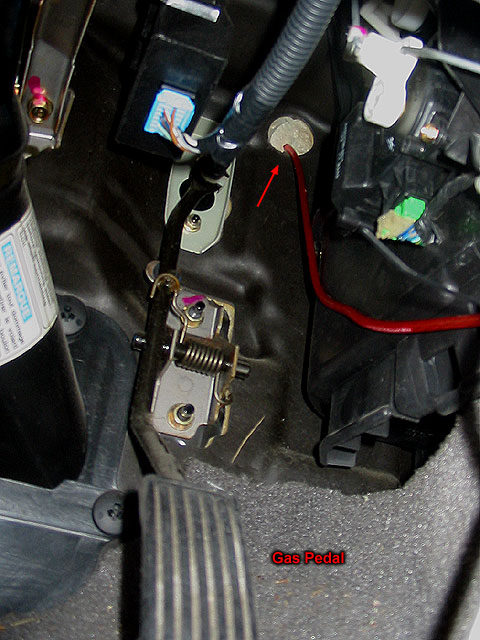
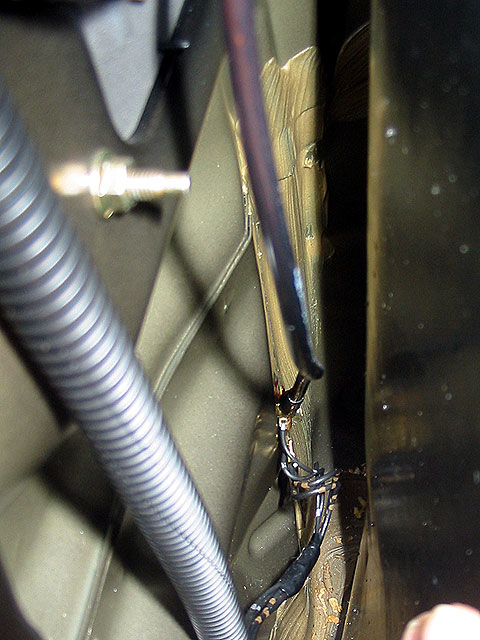
| Here is a better view of it (after the
cable has been run through). It is easiest to access from the inside
(see next picture). |
|
 |
|
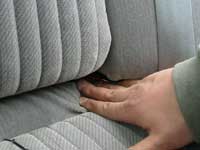
From inside your car, the hole is located above and
to the right of the gas pedal cable hole. If you follow your gas pedal
all the way up then look a tad farther you'll see a round plastic
circle. Note that you will need to contort yourself into very strange
and uncomfortable positions to reach this. You'll want a flashlight
to see what you're doing.
Rip off the plastic circle and you'll see a bunch of yellowish foam.
Rip this out too. It's all pre-cut to come out fairly easily. Now
you'll see smooth plastic behind it. This is the grommet. Give it
a good poke and it should fall out into the engine bay.
Return to the engine bay and find the grommet so that you can cut
a hole in it and replace it around the power cable to prevent water
and such from entering the hole that now exists in your firewall.
Howeer, I never found my grommet so I didn't do that. I just replaced
the foam that I pulled out.
From the engine bay, run the power cable through the hole and then
pull it all the way into the engine bay. Zip tie it to whatever you
can in the engine bay so it's not flopping around and getting caught
in any moving parts.
|
|
 |
|
Now that all the basic wiring done, we
need to run it all to the trunk. Grab the mess of wires you've got
and zip-tie or twisty-tie them up so that they look halfway organized.
Then figure out how you're going to route them. I stuffed them under
the plastic at the bottom of the center console for about a foot.
|
|
 |
|
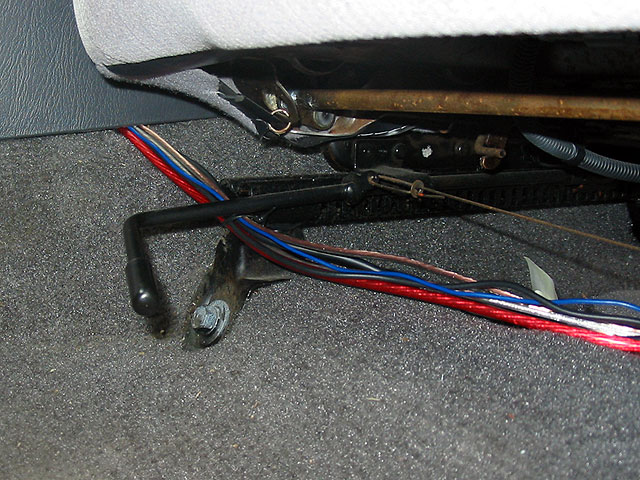
| The cables come back out under the seat
where I've attached them to one of the seat supports. Then they run
under the seat to the far left side of the car, under the rear floor
mat and up the side of the rear seat. Be careful to prevent them from
contacting any moving parts. You don't want to sever any of the cables
when you're moving your seat! |
|
 |
|
| I tucked the cables under the cushion
on the far left of the seat, then under the seat back to the trunk.
You may need to open and close your seat back to facilitate this. |
|
 |
|
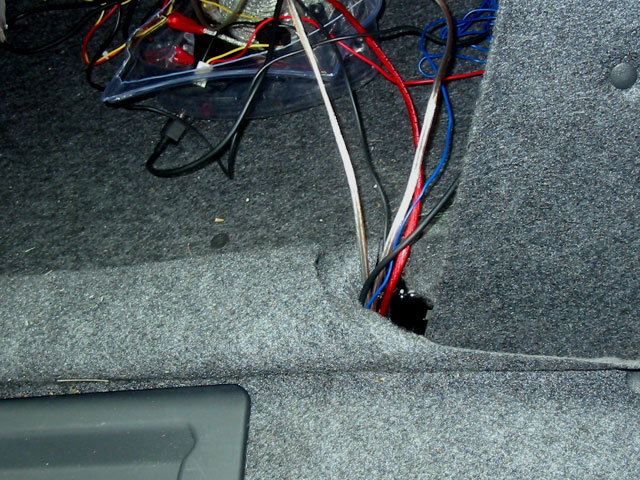
Now you've got all your wires in your
trunk. Check to make sure that the cables are ok when you open and
close the seat back.
I then ran all the wires along the top edges of the trunk lining.
You can tuck the cables behind the top of the lining so they are hidden
and run them to where you are going to put your amp/subwoofer/CD player. |
|
 |
|
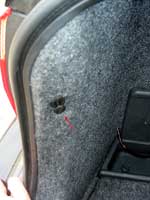
One more thing, we need to run the ground
cable for the car. There is a ground point in the trunk behind the
left panel. Remove the screw on the side and then pull out the peg.
You can then pull the lining out and you will see the ground point
as there are a bunch of other black wires running to it. It's pretty
difficult to access and I ended up taking the trunk's center plastic
panel off as well as the left storage bin. |
|
 |
|
| Here you can see the ground terminal behind
the lining. It's pretty difficult to get to and the screw is on pretty
tight but you should be able to do it. Here you can see the thick
black/brown ground cable installed. |
|
 |
|
Now connect everything together. There's a red main
power cable for the CD Player and the subwoofer that you can connect
to the red power cable that is now run into your trunk. Same with
the yellow remote power cables (which I connected to the blue remote
power cable that I used) and the black ground wires, which attach
to the ground cable you just installed. Finally, attach the speaker
signal cables to the subwoofer. Now do your best to organize all your
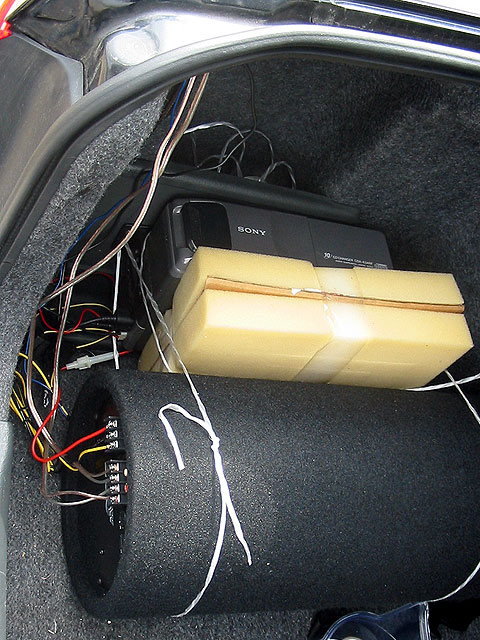
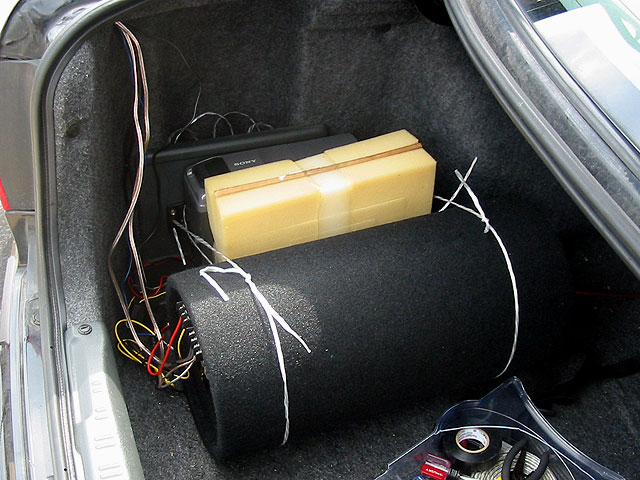
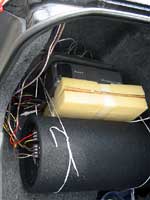
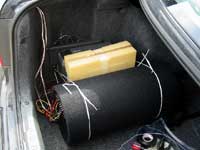
wires. I did a rather poor job.
Since the subwoofer tube is round it rolls very easily so you'll want
to tie it down somehow. Mine came with a strap but the screws it came
with were way too long so I just used some twine to attach it to the
CD Player mounts which I screwed into the left bin and the lining.
It seems to hold pretty well. |
|
 |
|
You're almost ready now. Return to the
engine bay and install the fuse that came with the power cable kit.
Now reconnect the negative power cable to the battery and you should
be good to go! Fire up your stereo system. Return to your subwoofer
or amp or whatever and fiddle with the settings until you achieve
the sound you want.
Impressions: I bought an el cheapo sub-woofer off ebay, and it sucks.
I decided to buy a pair of subs and an amp and to build
my own enclosure. |
|
 |
|
| Preparation | Installation |
|
|
| |
|
|
| |
|
|