| |
|
Click an image to enlarge. |
For Head
Unit and Amp installation, see this page.
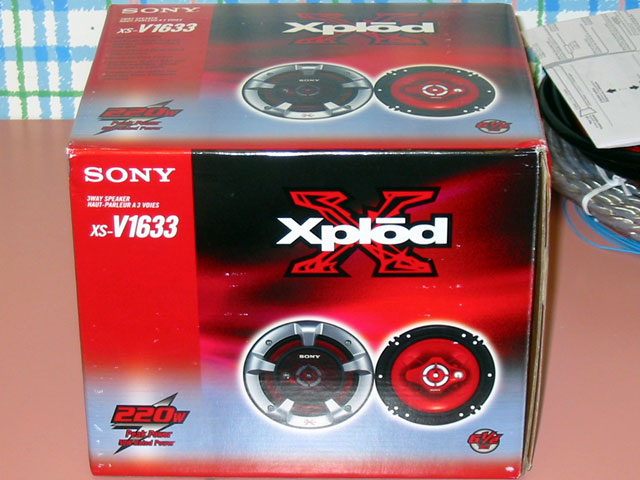
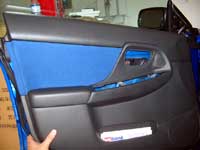
Here are my Sony Xplod 6.5" 3-way speakers that I got for my
STi.
|
|
 |
|
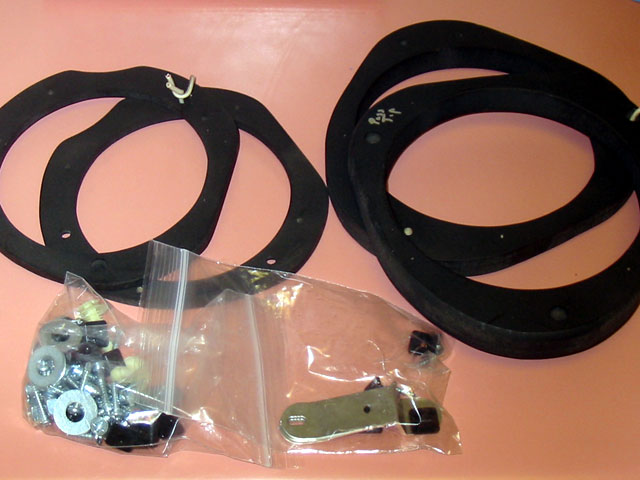
| Here are the Innovative Auto Performance
spacers that I used. This makes it much easier to install most speakers
by spacing them correctly to maximize clearance between the speaker
magnet and power windows as well as the front of the speaker and the
door panel. |
|
 |
|
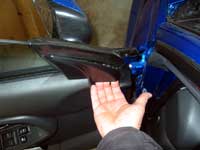
| First thing to do is remove the triangle
trim on the door by the mirror. Just reach into the front end of the
triangle and you should be able to pull it out. |
|
 |
|
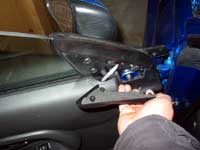
| The trim is held on by a few rubber pegs
so it's pretty easy to remove. |
|
 |
|
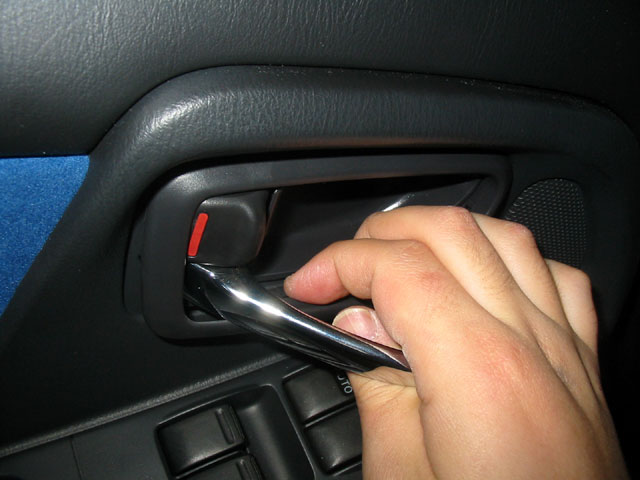
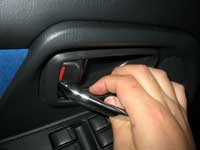
Now, one of the trickiest parts is removing
the trim around the door handle. It's snapped in pretty tight which
makes it difficult to get out, and since the plastic isn't that thick,
it's also farily easy to break it, although I did not have such a
problem.
I found it was easier to start at the bottom. With one hand hold the
handle open, then with the other hand dig your fingernails behind
the trim and pull. |
|
 |
|
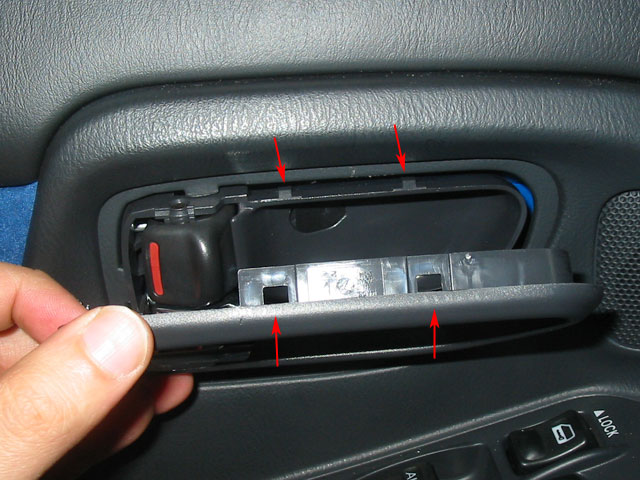
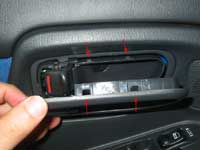
Here's a close up of the tabs that hold
the trim in. The trim has two square holes while the housing around
the handle has two tabs that fit in the holes. There isn't much room
for the trim to flex which is why it's so hard to get the trim out.
If starting from the bottom, you want to push downward on the trim
so it slips over the tabs.
If starting from the top, you want to push upward on the trim so it
slips over the tabs.
There's one more tab towards the front, but this is easy once you
get the top and bottom out. |
|
 |
|
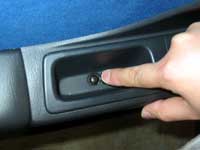
| Next, remove the screw inside the armrest.
You'll have to flip open a little cover and then unscrew it. |
|
 |
|
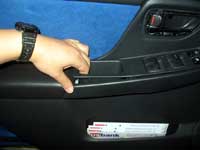
| Now, pull up from the back of the arm
rest. It will pop out from the back. |
|
 |
|
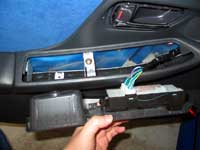
| Here you can see the arm rest and controls
pulled out. Note the tab on the front. When removing the controls,
pull up on the back and once it's free, pull back and it will come
free. When replacing it, put the front tab in first, then push down
on the rest. |
|
 |
|
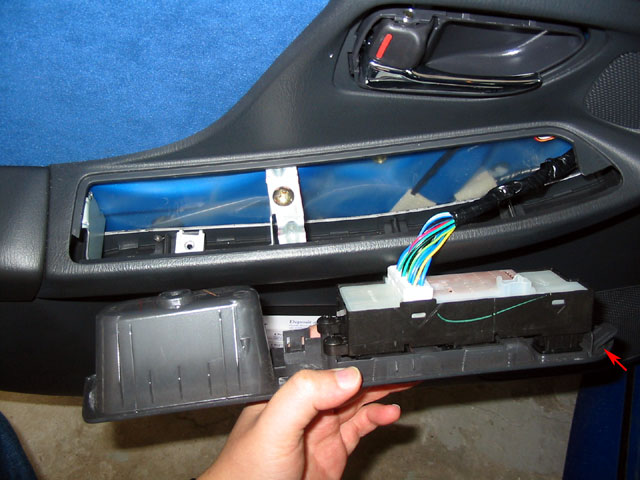
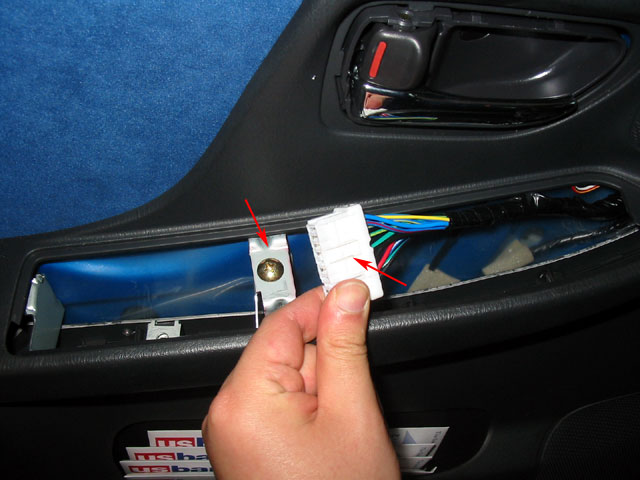
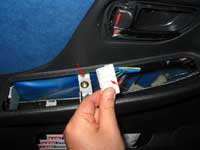
| Remove the wiring harness for the controls.
On one side of the harness you will see a small white tab. You need
to press this to release the harness. Then remove the brass screw
fastening the arm rest to the door. |
|
 |
|
|
Now, to remove the door panel, start at the bottom rear corner.
The panel is held on by 6 or 7 clips. The first one is the hardes
one to remove. Slip your fingers in and you will need to pull pretty
hard before it will come apart.
Work your way along the bottom and remove all the bottom clips.
Then work your way up the sides. See the next couple pics to see
the location of all the clips.
Do not pull the top part of the door outwards.
|
|
 |
|
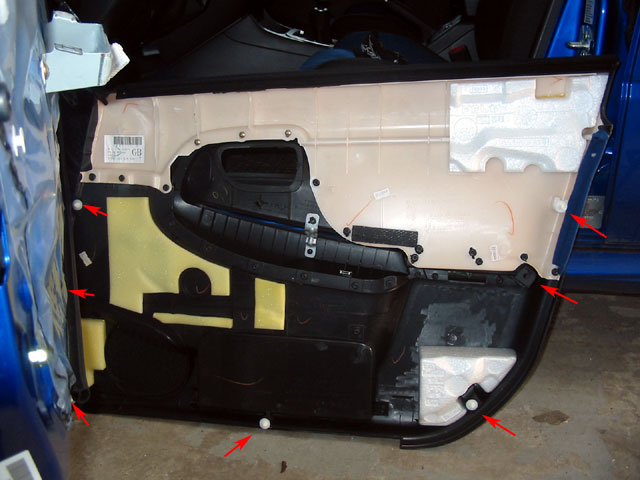
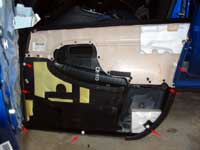
| Once all the clips have been popped out,
simply slide the panel upwards off the two pink plastic hangers at
the top (see next couple pics). |
|
 |
|
| Here is inside of the door panel. You
can see all the clip locations. I think there are 7 but I can't remember
and the left side of this picture is a bit cut off, but I think there's
3 clips there. |
|
 |
|
| Removing the Door Panel | Installing
the Speaker |
|
|
| |
|
|