| |
|
Click an image to enlarge. |
Now that all the preparations are complete,
lets get the hardest task done first. Running a power cable from the
battery in the engine bay, through the passenger cabin and into the
trunk. This is for the sub-woofer amp I'm running in the trunk. If
you don't have an amp and don't need to run power to your trunk, you
can skip to the next page.
To install door speakers, please
see the DIY here.
As always, when doing wiring, disconnect the car's battery by loosening
the clamp on the black wire on the negative battery terminal and removing
the wire. You should put something non-conductive there to prevent
the wire from moving and touching the terminal, such as a folded up
rag.
|
|
 |
|
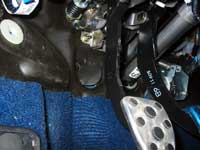
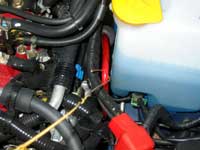
We need a way to get the cable through
the firewall. There are a couple access points in the firewall sealed
by rubber grommits. For instance, there is one directly behind the
intercooler, but I couldn't see it from the engine bay so I didn't
use it.
Instead, I used this one that I found in the foot well behind the
brake pedal. On the inside you will see a black plastic circle that
you can pull off partially to expose the rubber grommit.
|
|
|
|
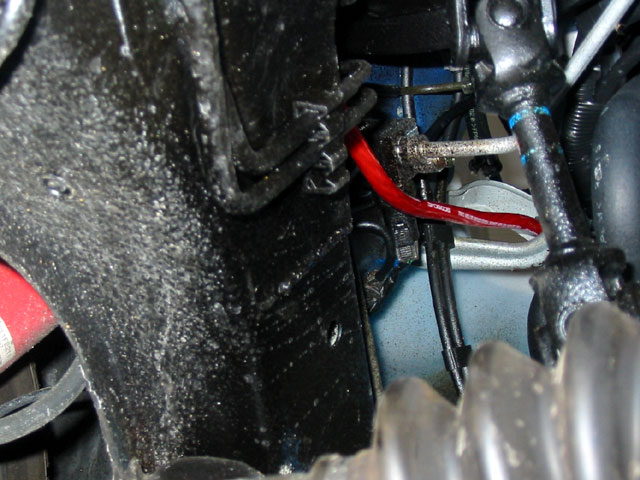
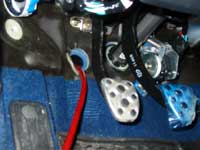
Push through the hole with your finger
and the grommit should pop out and fall to the ground under the car
if you push hard enough. In my case, the grommit got caught on a ledge
so I found it was easiest to jack up the car and get under to find
the grommit. The access point of the hole is just above and forward
of the front left axle.
Get the grommit and cut an X through the center (or a small hole)
and run your power cable through it. Make sure the grommit is in the
right direction for when you run the wire through the hole and slide
it until it's just a few feet from the battery end. |
|
 |
|
If you have some foresight, which I didn't,
you should run the cable through your engine bay and connect the appropriate
end (the one with the fuse) to the battery so that everything is in
order.
Then, get back under the car and feel for the hole (you can't actually
see it) and pass the other end of the cable through. You can also
feed a hanger from the inside and hanging the cable off the end and
pulling it back through to the inside, but I just fed it through while
I was under the car. You may need to adjust the position of the grommit
on the cable some more.
To explain the picture, that rubber accordion thing on the right is
the boot on the left front axle and the left wheel well is to the
left. It's a tight squeeze in there, but you can access the hole,
even though you can't see it. |
|
 |
|
| If you didn't have the foresight, you
will need to figure out a way to get the fused end to the battery
from the ground. I used a hanger that i shaped into a hook and used
that to pull up the end of the cable through all the other cables. |
|
 |
|
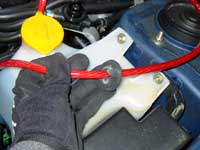
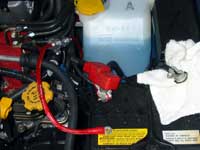
| Route the cable appropriately and then
attach the end to the postivie battery terminal by lifting up the
red cover, removing the top bolt (not the main terminal bolt) and
adding the cable to the others and tightening the bolt back down.
|
|
 |
|
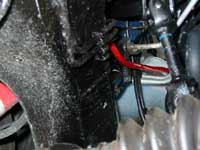
| Replace the cover when you're done. You
may wish to cut the red plastic cover a little to allow the cable
to fit better. |
|
|
|
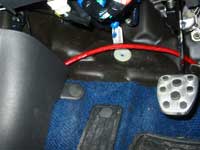
Go inside the car and start pulling the
cable all the way through.
Get back under the car and slide the grommit up to the access point
and plug it up with the grommit again. This is a pain as there is
very little space for your hand to move or get leverage, but it is
possible. After half an hour of getting really annoyed, I took a break
and tried again and the grommit went in the hole right away.
You're done with the engine bay wiring. You may wish to tie the cable
down at whatever points are appropriate with zip-ties or twisty-ties. |
|
 |
|
You may want to cut a hole in the rubber
flap on the inside and cover up the access point when you're done.
The rubber grommit should be fine, but it's always nice to return
things to their original condition if possible.
|
|
|
|
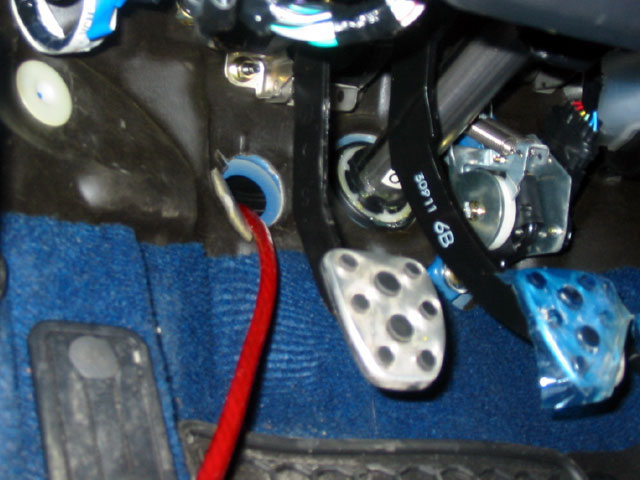
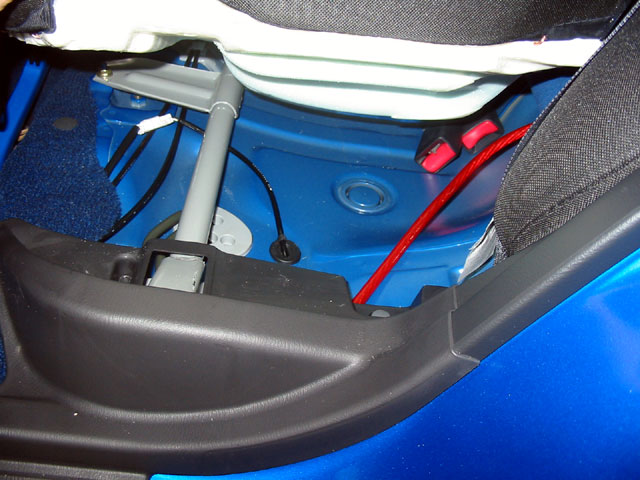
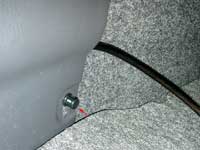
Now we need to route the power cable.
I routed mine to the left and into the plastic trim on the side, then
down under the plastic door sill.
I also used a twistie-tie to fasten the cable to the white circle
you see in the picture. I have no idea what that white plastic circle
is, but I know that it doesn't come out with a fairly strong pull,
so I just wrapped a twistie around it and tied it to the cable. Make
sure that the cable doesn't interfere with your clutch or brake pedal.
|
|
 |
|
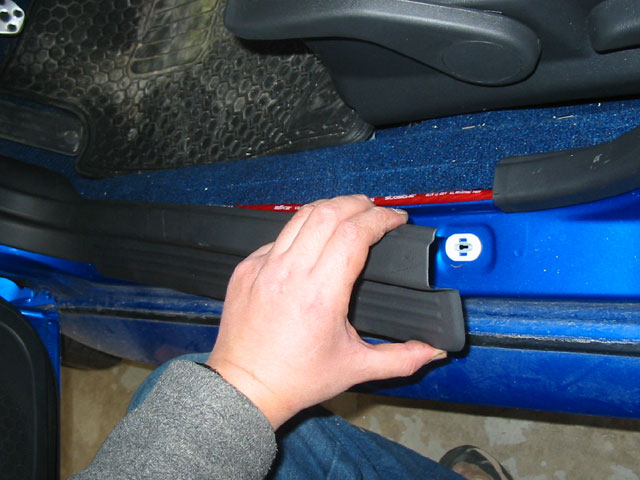
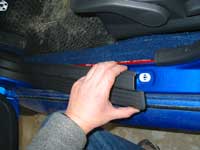
The plastic door sill is pretty easy to
remove, just carefully pull up the rear end and slowly move forward
popping it out as you go. Cram the cable under the carpet a little
as there is more space down there along with other wires.
Also loosen the plastic trim on the B-pillar (the one between the
front and rear doors) by just pulling it up a little and you can feed
the cable through there. |
|
 |
|
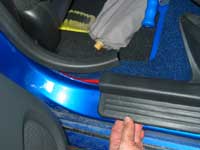
| Pull up the door sill in the rear and
the trim on the B-pillar and cram the cable under there as well. |
|
 |
|
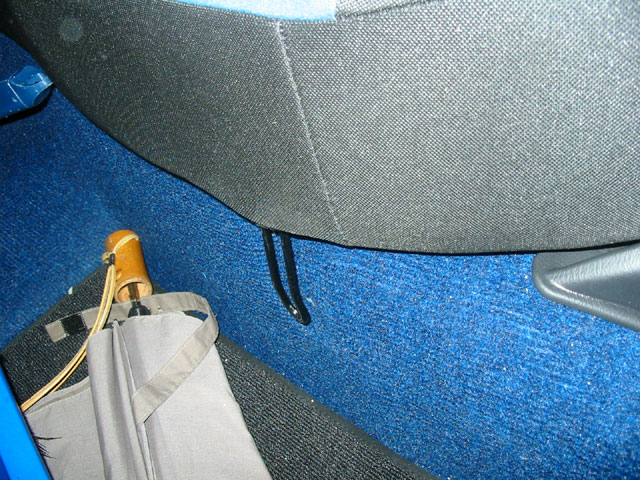
| Now, to access the trunk, we need to remove
the back seat cushion. It is secured by three bolts. One buried in
the back of the cushion in the center and one in front on each side.
You only need to take out the front one on the side you are working
(left for now). Then you should be able to wiggle the cushion forward
and then up. |
|
 |
|
| You will see the sheet metal under the
sheet and you can run the power cable under the seat and into the
trunk. |
|
 |
|
| If you can't see how to get to the trunk
from the back seat, then go to the trunk and lift up the forward left
corner of the carpet. You'll see where the seat back meets the sheet
metal. Feed a hooked hanger through the crack at the bottom and when
you return to the back seat you should see it and be able to use the
hanger to pull the cable through. |
|
 |
|
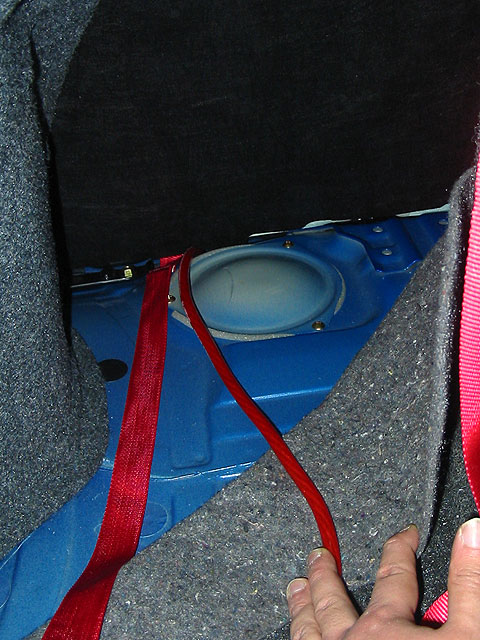
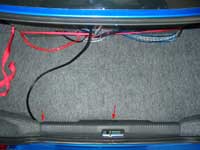
| Pull the cable through. Also, one option
for securing your enclosure is to tie it down to the LATCH child restraint
anchors hidden in the seats. I did it this way by attaching a strap
hook to the anchor and running the strap to the trunk. When you're
done, replace the carpet and re-attach the seat cushion. |
|
 |
|
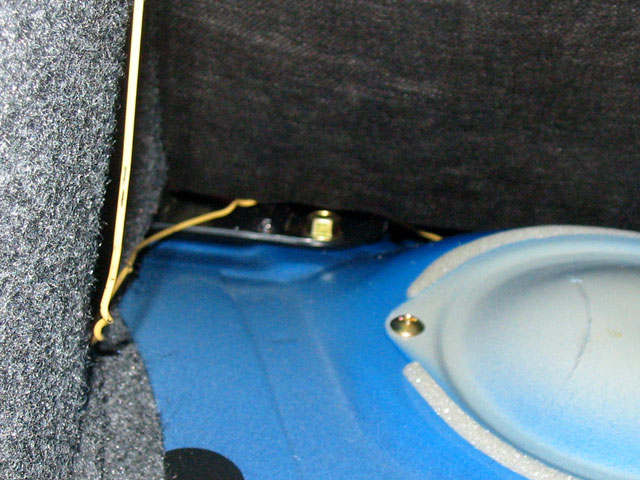
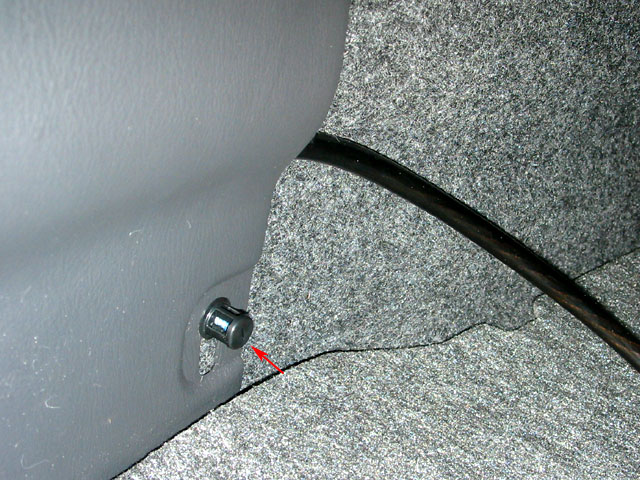
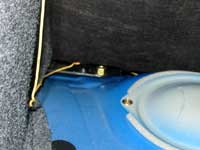
| The other power cable that needs to be
routed is the ground cable. Here you can see the ground cable running
to one of the bolts that holds the trunk latch. I ran the cable behind
the plastic trunk lining. The arrow on the left shows where the wire
goes under the lining and the right arrow shows the where the grounding
point is. |
|
 |
|
| To loosen the lining, there is a little
thumb screw that you can remove. Just take it off and you can pull
the lining out a bit to fish the cable through. You may want to use
the hanger method to help you out. |
|
 |
|
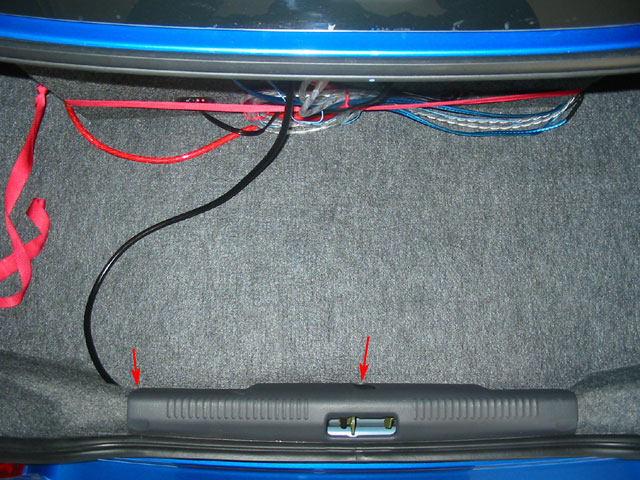
Here's a close up of the bolts for the
trunk latch. I chose the bottom one so it would be less conspicuous.
Now you're done with the power cables so we can move on to the head
unit installation and wiring. |
|
 |
|
| Preparation |
Routing Power Cables | Installing and
Wiring the Head Unit |
|
|
| |
|
|